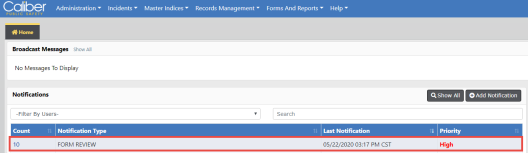
When a new public or non-public form is submitted, a notification appears on the Online RMS Home Page within your Notifications queue.
The Notification Type for form submissions is FORM REVIEW - FORM NAME.
Note: For more information on Notifications, refer to “Notifications”.
Follow these steps to review and take action.
1. Click on the Count hyperlink.
The Notification Description begins with the name of the Custom Form.
| - | Use the Search By option to filter by Description if your agency uses more than one Custom Form configured with Form Review Routing. |
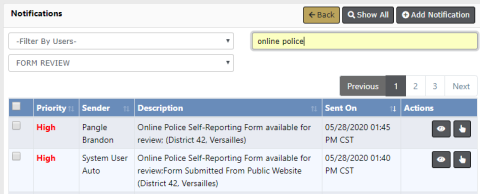
| 2. | Click on the Take Action icon  to open the form. to open the form. |
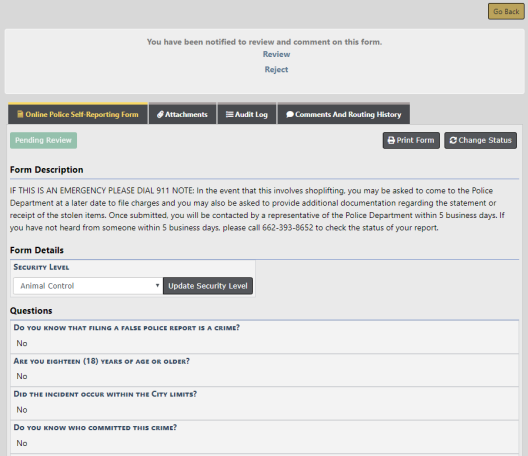
There are four tabs.
| • | Tab 1 includes the Information as submitted by the public. |
| - | The form opens to this tab by default. |
| - | This tab is where you Take Action. |
| • | Tab 2 includes Images submitted by the public or non-public. |
| - | Click on this tab to review images. |
| - | Presently, only one image can be uploaded with a public submission. Allowing more images is planned for a future release. |
| • | Tab 3 maintains an Audit history of users access to the Custom Form. |
| • | Tab 4 maintains Comments and Routing History of the submission and routing actions. |
| 3. | At the top section of Tab 1, Reject or Review (Accept) the form by choosing one of the options below. |

1. Click Reject to reject the submission.
It is suggested that you use this option to track that the submission is not consistent with the purpose of the custom form (e.g. does not involve a crime or is an event for which the submission was not designed or your agency does not wish to track).
| 2. | Enter a Comment or reason. |
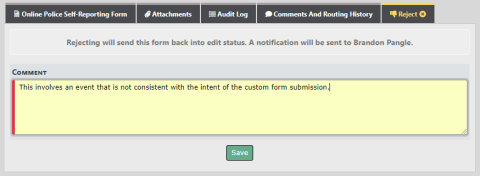
| 3. | Click Save. |
| 4. | Manually inform the submitter by email or phone call. |
Note: Informing the submitter does not happen automatically; this is a manual process.
Follow these steps when the submission involves an event that does not require a police report. You do, however, want to show the Custom Form was Reviewed and Accepted by your agency.
1. Click Review.
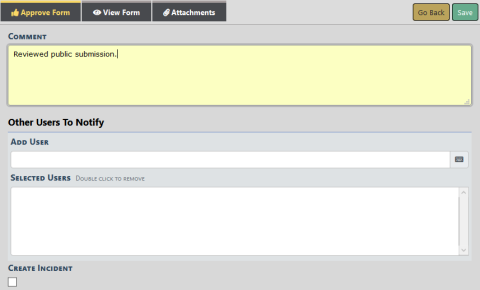
| 2. | Enter a Comment. |
| 3. | Add other Users to notify others from review routes for awareness only. |
| 4. | Leave the Create Incident box unchecked. |
| 5. | Click Save. |
Follow these steps when the submission involves a crime or event for which you need to file an official police report.
1. Click Review.
| 2. | Check the Create Incident box on the Approve Form tab. |
| 3. | Depending on the configuration by your agency, the Report Number will either be Auto Generated or require manual entry of a Case Number requested and obtained from a CAD system, respectively as shown below. |
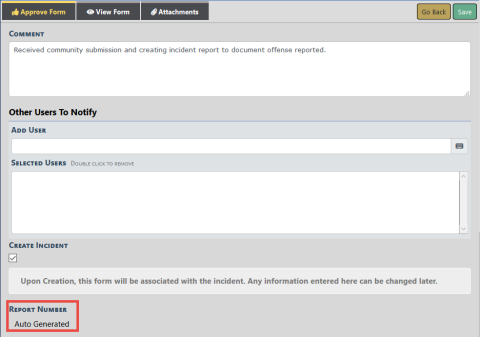
If the Report Number is Auto Generated as shown in the first example above, no additional action is required for the Report Number.
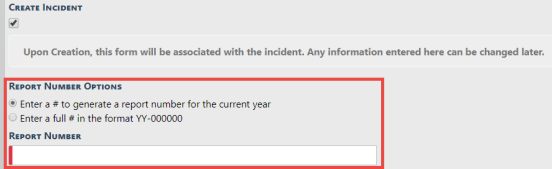
If the Report Number Options displays as shown in the second example above, enter the Report Number based on one of the following options you choose:
a. The default option is to enter the digits of the Report Number obtained from CAD. RMS then generates the number using the format defined.
b. You can select the option to enter the full # obtained from CAD in the specified format.
| 4. | Add Other Users to Notify to notify them for awareness purposes only. If your agency administrator requires at least one user, a note appears in red. |

| 5. | Complete the remaining fields on the Approve Form tab. |
Note: The View Form tab easily switches views, to view the Form for information needed to complete the Incident Fields on the Approve Form tab.
a. Report Date/Time - Default to the system date and time. Update as needed.
b. Occurrence Date/Time - Set to the date and time reported by the form submitter.
c. Incident Type - This can be set to default to a Type, allowing tracking of incident reports originating from a Publicly or Non-Publicly Available Custom Form. If defaulted, it is recommended that you do not change the value.
d. Summary - This field relates to the Crime/Media Summary field on the incident report.
| - | Use the Copy From LOV to select copy text from a Custom Form field to the Summary. |
| - | Use the LOV multiple times to copy information from multiple fields in the Custom Form. |
e. Responsible User - Default to your name as the creator of the incident report. You can select another user from your agency to assign/transfer the report.
f. Narrative - Optional entry. Use this field to quickly create the Narrative for the incident report.
| - | Use the Copy From LOV to select copy text from a Custom Form field to the Narrative. |
| - | Use the LOV multiple times to copy information from multiple fields in the Custom Form. |
| 6. | Click Save to create the Incident Report and set the Status of the Custom Form to Reviewed. |
| 7. | A message displays indicating an Incident Report was created and the Custom Form and Image were automatically associated to the Incident Report. |
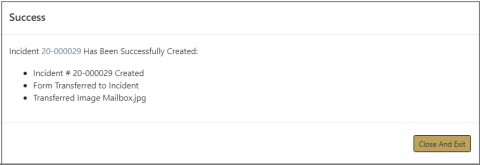
| • | The user assigned to the incident report can take action to complete the report from their Recent Activities - Initial Report queue. |
| • | Complete the incident report, adding location, offenses, names, and property/vehicles as required. |