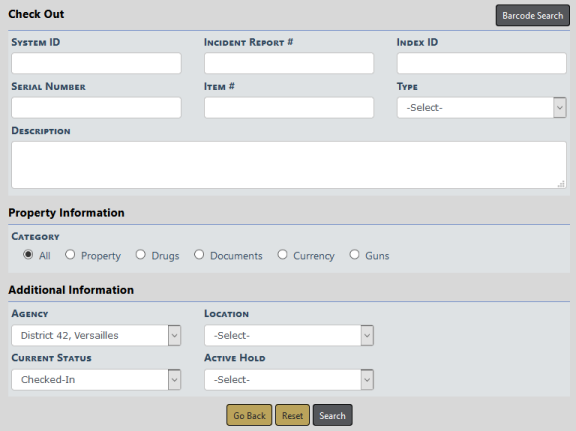
The Check-Out link will allow the user to search for property to Check-Out. The Status of the property must be Checked-In or Check-out to take this action.
Once the item is located and selected, you can document the person it is going to and the destination.
Select a Category and enter other search criteria. The fields below the Category change based on your Category selection.
Click Search. Or if you are equipped with a barcode scanner, click the Barcode Search button to search records by scanning the barcode.
The Check Out Search Results screen appears.
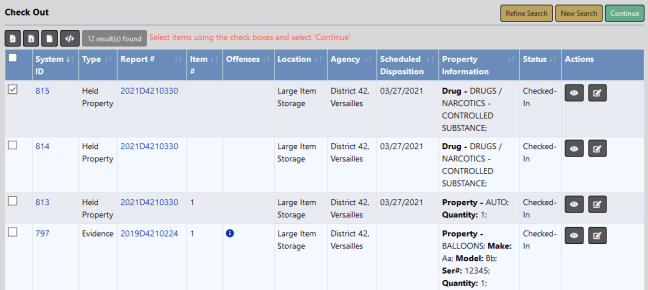
Select one or more records you want to Check Out then click Continue to display the Check Out screen.
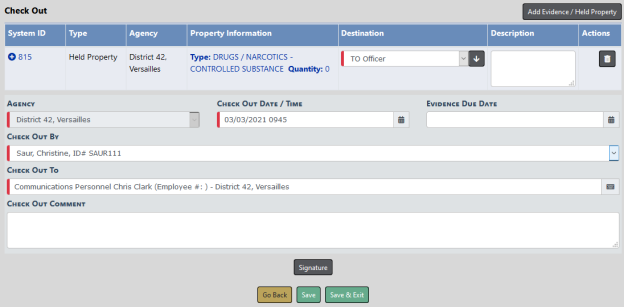
Choose the Destination from the drop-down list, enter Check Out To and other necessary data.
If you wish, you can also add additional evidence or held property to the Check Out list by clicking on the Add Evidence/Held Property button on the top right of the screen to open the Evidence - Held Property Search Check Out screen. Follow the same process as above to search and select the evidence or held property you want to add, then click the Continue button. The additional records are then added to the Check Out list.
Click the Signature button to sign if necessary.
Note: RMS now supports dual to/from signatures for both parties involved in evidence transfers (where applicable). A user may also configure a PIN (Personal Identification Number) by editing their profile and then entering a PIN to enter their signature. Only the person whose PIN is being created may log in and create their PIN.
Click Save to save your changes and remain on the page to print Receipts, Labels, or Chain of Custody. For details, refer to Print Labels, Chain of Custody, Receipts.
Click Save & Exit to save your changes and exit the page.