Fleet Managers have the ability to add vehicles to the Fleet Management module by way of the Fleet Management Dashboard. For details on accessing the dashboard refer to Fleet Manager.
1. Click on the Manage Vehicles button on the Fleet Management dashboard.
| 2. | The Fleet Vehicle Search screen appears. Before adding the vehicle, it is recommended you first search for the vehicle to verify whether or not it already exists, though not required. For instructions on how to search for vehicles refer to Search Vehicles . |
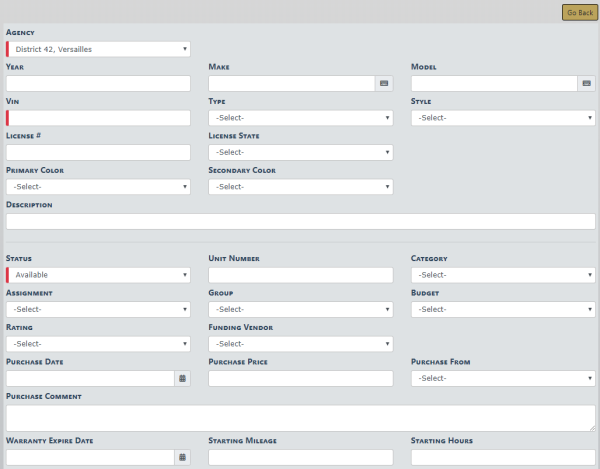
| 3. | Click on the Add Vehicle button on the Fleet Vehicle Search window to open the Add Fleet Vehicle screen. Enter the Vehicle information in the fields provided. |
Note: Custom Fields, if applicable, do not appear until after you add required fields and select the Save button. Once the screen refreshes, the custom fields appear for filling in.
| • | The Agency of the vehicle defaults to the Fleet Manager's agency; however, with appropriate permissions you can change it to any agency within the organization by clicking on the  . . |
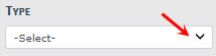
| • | The fields with -Select- supply a specific list from which to choose. For example, to search for a vehicle Type of Automobile click on the and a list will appear, then click Automobile from the list and it appears in the field. |
Note: The list of available Styles dynamically changes based on the chosen Type.
| • | The fields with an  on the right supply a list of available values based on data you type in the field. For example, click into the Make field and type chev to view a list of chev options from which to choose, then click on the option you want and it appears in the Make field. on the right supply a list of available values based on data you type in the field. For example, click into the Make field and type chev to view a list of chev options from which to choose, then click on the option you want and it appears in the Make field. |
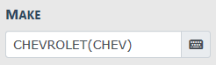
Note You must select from the list that appears for the system to function as intended, even if you manually enter data into this field to narrow down your choices.
Note: The list of available Models dynamically changes based on the chosen Make.
| • | You can enter the Starting Mileage or Starting Hours at time of purchase. This value is used in determining mileage or hours used on the vehicle. |
Note: The Status is required when adding a new vehicle record. Examples are Assigned, Out of Service, and Available; though will vary by agency.
| 4. | Click Save to create the Vehicle record, or click Go Back to return to the Fleet Vehicle Search screen without creating the record. |
When you select Save, the Edit Fleet Vehicle screen displays.
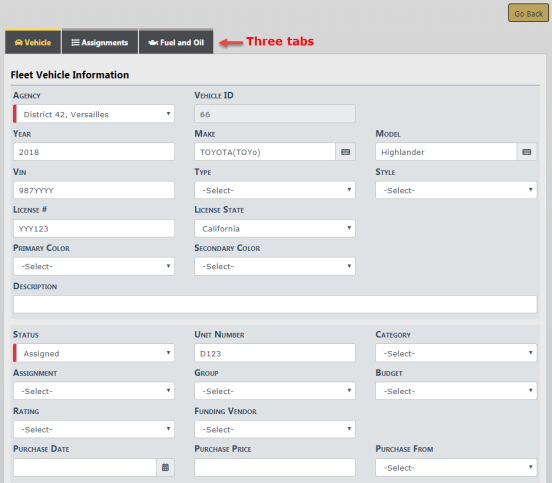
There are three tabs: Vehicle, Assignments, and Fuel and Oil; vehicle information, assignment history of the vehicle, and fuel &oil history, respectively. For managing the information in these tabs refer to Edit Vehicles .
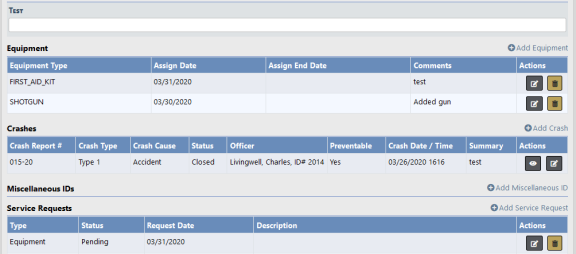
While on the Vehicle tab, page down to view or add additional vehicle information in grid format such as attachments, service requests, insurance, inspections, etc. The same general procedure is used for all grid topics, though information will vary. For general instructions refer to Add a Service Request .
Note: Custom Fields, if applicable, appear on the screen immediately above the grid section on the Vehicle tab. The custom field Test is used as an example.
