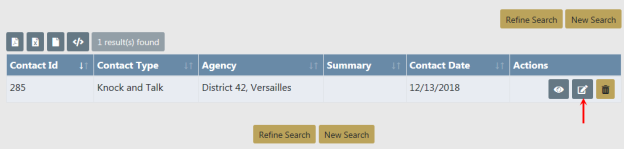
To edit a Field Contact you must first Search for the Field Contact, then select the Edit icon in the Search Results window. For more information on searching refer to Search for a Field Contact.
1. Select the Edit icon on the Field Contact record in the Search window to open the Edit Field Contact page.
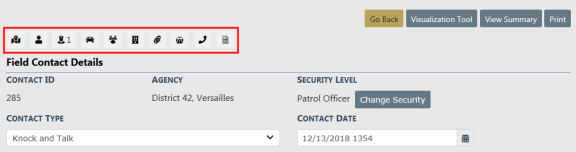
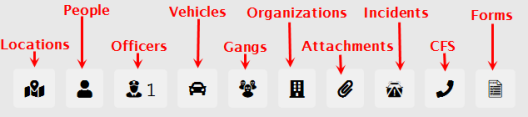
There are several sections that make up the Edit Field Contact page. Each available section is listed across the top as icons. Click on any icon to go directly to the corresponding section, or scroll down the page to each section. The number that appears on the icon indicates the number of records associated with that icon. For example, the number 1 on the Officer icon indicates there is one officer record, and no number indicates there isn't a record associated with that icon.
Note: Field Contacts can associate with a Calls for Service (CFS) event while in Edit mode. Click on the Calls for Service Go To link or page down to the Calls for Service grid to add an associated CFS to a Field Contact record. If the CFS has associated incidents, a pop-up window appears to select incidents that should also be related to the Field Contact.
| • | Click the Print button to print the Field Contact. For more information refer to Print Field Contacts. |
| • | Click the Visualization Tool button to view display connections between people, addresses, involvements, etc., in a graphical format. For more information refer to Crime Visualization Tool. |
Note: This button is based on user permissions and is not visible to all users. For more information contact your administrator.
| • | Click the View Summary button to view a summary of the Field Contact. |

Click Go Back to return to the Search Results, or click Edit Interview to return to the Edit Field Contact page.
| 2. | Complete all applicable sections and click the Save button after each section. For detailed instructions refer to Enter or Update Field Contact Details. |