
Using the Browse feature, the inventory manager can search one or more warehouse locations by the type and category tree. (An advanced search is available for greater refinement.) The search results allow the inventory manager to select items to create a list. The inventory manager can then take action on the list, which is treated as a single group, and the selected action is applied to all items in the list. Actions available allow the inventory manager to assign items as needed to meet various needs. (Online RMS records each transaction as it occurs.)
From the Inventory Management page, click the Browse option to display the Browse screen.
The number of locations available to the current user is shown to the far left in the Locations banner near the top of the page.
Click the blue information bubble icon to the left of Locations to set the locations.
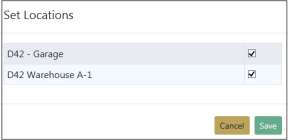
To make the listed location available, ensure the box to the right is checked
To make the location unavailable, remove the check mark
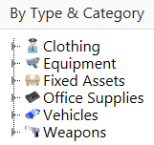
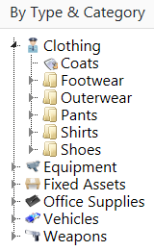
Types are listed in the By Type & Category section in the upper left.
Categories are contained within the types folders.
The Other Search Options contains Advanced Search. Click on the Advanced Search button to view additional search fields.
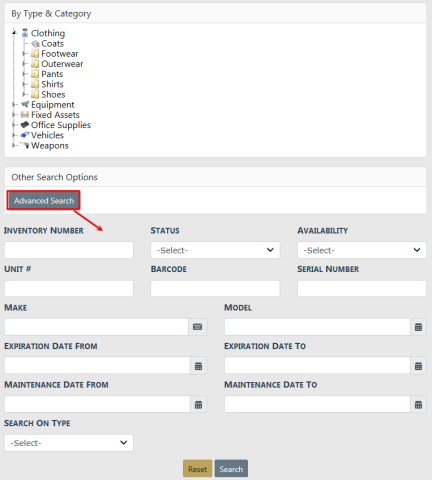
Enter the search criteria then click the Search button to return results.
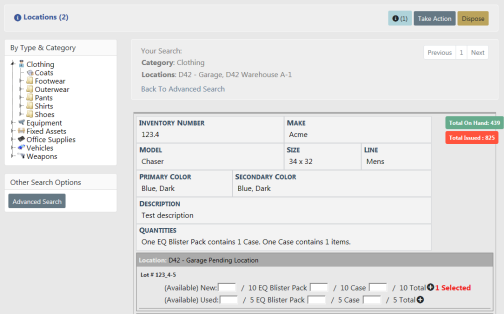
To select items from a category, type the quantity that you want to select in text field to the immediate left of the  icon and click to display the number of items you want to select as shown in the partial example below.

When you have selected items, the number of items selected as well as the Take Action and Dispose option replace the No Selection label to the far right in the Location banner.
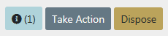
You can click on the  icon to display the View Selected Items page where you can delete individual items, Clear All Items, and/or Print your current selection. Select Go Back to return to the previous page.
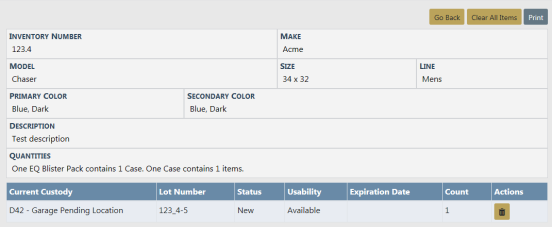
Continue to browse and select items as needed.
When you have selected all the items you want to take a particular action on, click Take Action to display the Inventory Management page as shown.
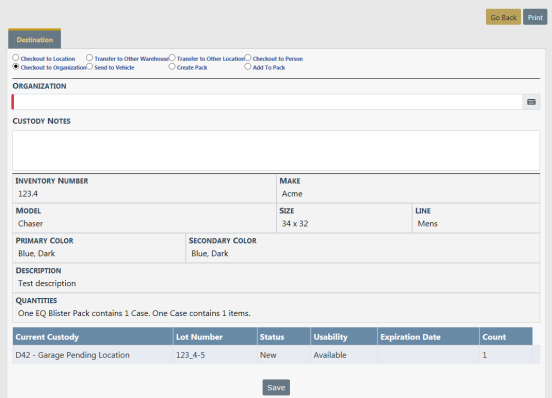
Select the appropriate radio button to indicate the destination of the item(s):
| – | Selection of Checkout to Location or Transfer to Other Location changes the display to include a field for selection of a Location. |
| – | Selection of Checkout to Organization changes the display to include a field for selection of an Organization field. |
| – | Selection of Checkout to Person changes the display to include a field for selection of an Officer / Employee. |
| – | Selection of Transfer to Warehouse changes the display to include a field for selection of a Warehouse. |
| – | Selection of Send to Vehicle displays the Select Vehicle window to allow selection of a vehicle. |
| – | Selection of Create Pack changes the display to include additional fields to set up a pack. |
| – | Selection of Add to Pack displays the Select Pack window to allow selection of a pack. |