Broadcast Messages allows users with appropriate permissions to relay information to other users, with the option to send to specific schemas.
The information can be enforcement related, informational, or administrative in nature. Broadcast Messages relay administrative messages to users such as mandatory meeting or firearms qualification notices as well as time sensitive information such as an Attempt to Locate notice for a stolen vehicle or reckless driver.
Each message includes a start and end date/time. . Various message types (informational, web sites, Amber Alerts, warnings, training tips, and so forth) are selected then set with specific priority levels.
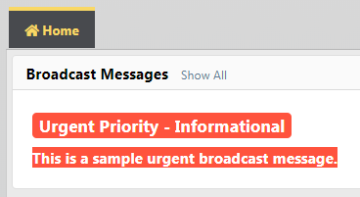
Color coded messages improves awareness and recognition of critical and high priority messages.
Urgent Priority Message
Full color coding of the message.
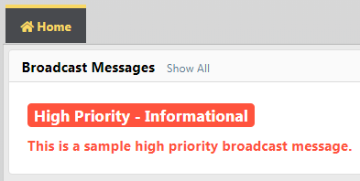
High Priority Message
Color Coding of high priority message.
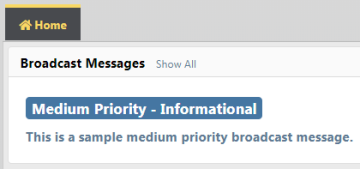
Medium Priority Message
Color coding of medium priority message.
When more than one Broadcast Message is in the queue, each message will display for approximately fifteen seconds before transitioning to the next message. This will continue to the last message before starting the sequence again. You can display all messages in the queue by clicking on the message to open the View Messages window

Click on the Next button to view the next message, if applicable.
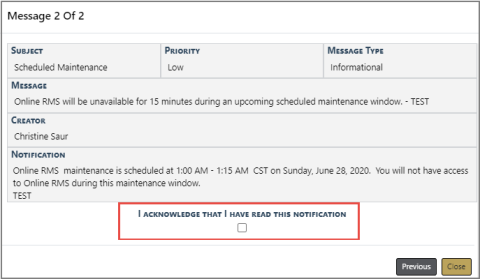
If a message requires acknowledgment, the message appears every time you log in, until you select the Acknowledgment checkbox.
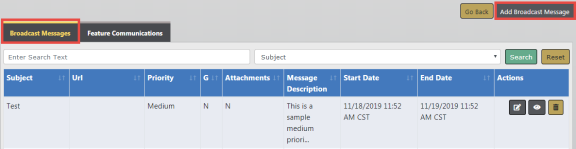
1. Click on the Broadcast Messages tab. Click on the Add Broadcast Message button located on the top right above the message grid to open the Add Message window.
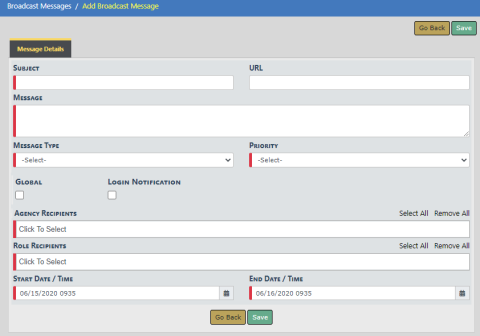
Note: Any field with a red left-hand border is a required field.
| 2. | Enter a Subject. |
| 3. | Optionally enter a URL. |
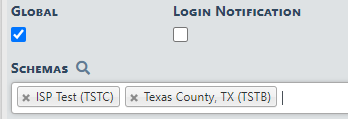
| 4. | Select the Global checkbox if you want to send the notification to schemas rather than agency recipients. |
Note: This option is only available to Caliber Admin users.
a. A Schemas field appears. Select one or more Schemas.
| 5. | Select the Login Notification checkbox if you want the notification to display to users upon login. |

a. When you select the Login Notification checkbox, a text editor opens, where you can enter a message and format the content.
b. Select the Require Acknowledgment checkbox if you want to require users to acknowledge the message. If this option is checked, the message appears every time a user logs in, until the user acknowledges the message.
| 6. | Select Agency Recipients. Choose one or more listed agency in the agency’s schema/workgroup. |
Note: If Global is checked, skip this step.
| 7. | Select one or more Role Recipients. |
| 8. | Click Save to create the message, or click Back to return to the Message Center. |
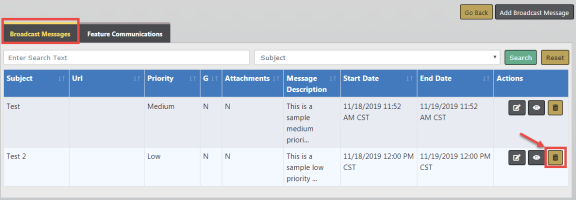
You and other users within your agency, who are authorized to delete messages, can delete each other's Broadcast Messages. For multi-tiered agencies: Users outside of your agency, who are also authorized to delete messages, cannot delete messages created by another agency.
To delete a Broadcast Message, click on the Delete icon  . If the Delete icon does not exist, then you are not authorized to delete that message.