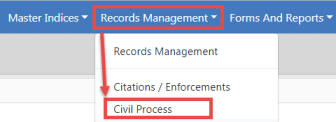
The Civil Process application is found within the Records Management section. Click on Records Management You can hover over the tab and drag and drop or you can hard click on the tab and screen will open as it looks below.
To access the Civil Process module, select the Civil Process option from the Records Management drop-down menu.
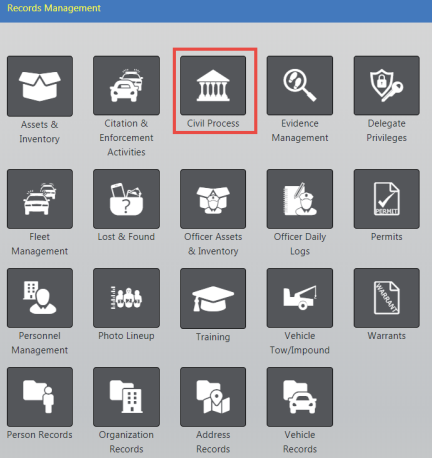
Or, select the Civil Process Icon/link from the Records Management pages.
When you click on Civil Process you are first taken to a Search page section within Civil Process. Searching this module is done similar to other areas within Online RMS.
Note: The terms Court Paper and Civil Progress used throughout this chapter are synonymous with each other.
The search feature allows you to search upon any of the standard fields and additional criteria fields to generate the information you are seeking. Just like with our other search areas those results can then be exported out as reports to manage the data.
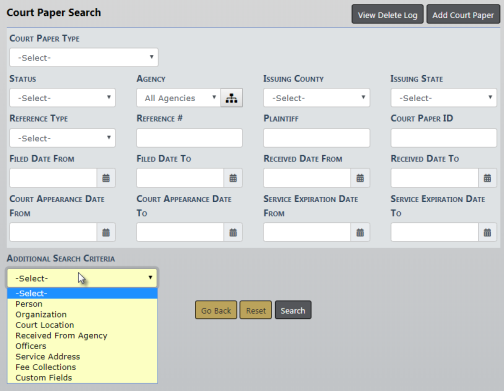
Click into the Additional Search Criteria field to search on other fields. This is where you are able to search by Person, organization, officer, etc. The more information you provide in the search, the narrower the search results.
The results of the search criteria from above are displayed below with all matching data.
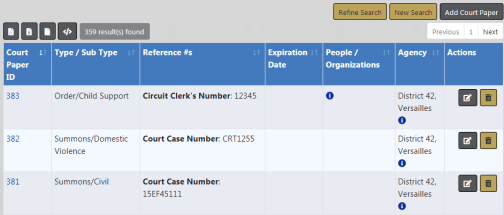
From this screen you can now access the record you want by using the Edit icon  on the right to make changes or update information. Click on the Court Paper ID# to enter the View mode for that particular court paper.
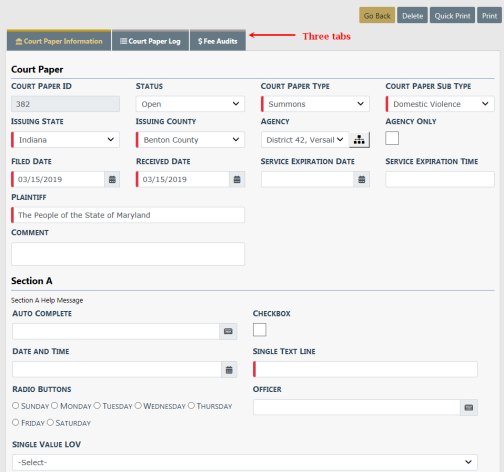
In View mode, you can see information about the paper as it was entered, add and view entries made in the log for service of the paper, and track incurred fees. This allows for tracking of changes, updates and service attempts.
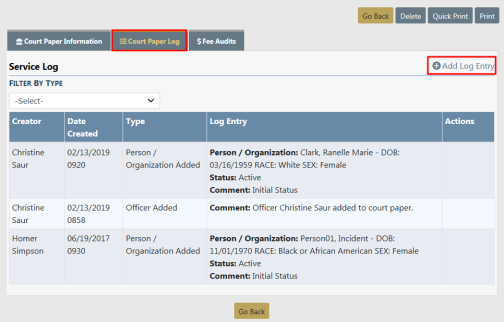
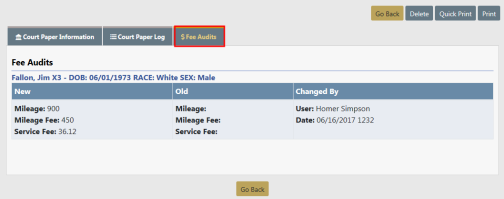
There are three tabs: Court Paper Information, Court Paper Log, and $ Fee Audits.
The Court Paper Information tab opens by default.

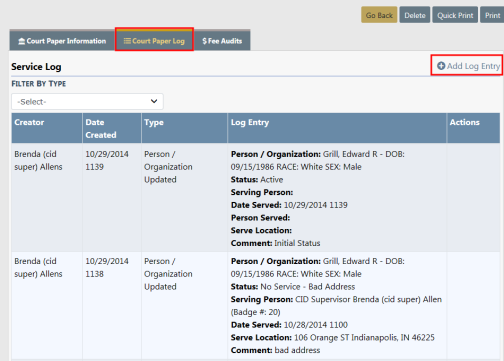
The Court Paper Log tab contains a log of updates made to the Court Paper, and the officer can manually log the attempts to serve the paper. Hover over the bubble to display the notes the officer made.
Note: The Add Log Entry hyperlink appears while in Edit mode, and not while in View mode.
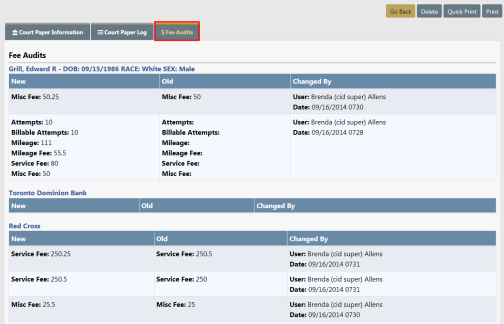
The $ Fee Audits tab tracks incurred fees.
To create a new Court Paper select the Add Court Paper button to open the Add Court Paper screen.
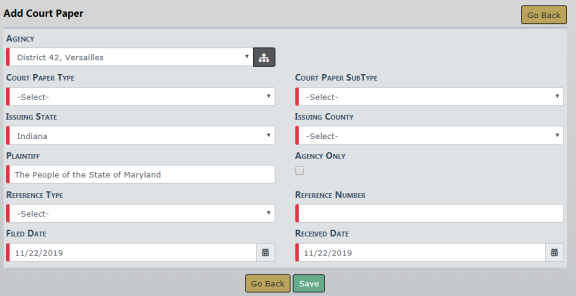
Select from the drop-down lists and enter other necessary information.
Click the Save button to create the record and display the Edit Court Paper screen.
The Edit Court Paper screen allows you to continue entering information section by section. Data entered in the Add Court Paper screen auto populates into the fields within this screen.

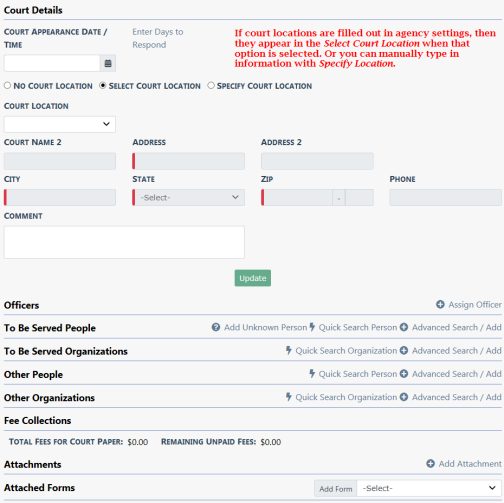
The next section is the Officer section of the module. This can be utilized if you want to assign the paper to a specific Officer. The officer receives notification of the assignment and it appears in their Recent Activities.
To add Officer to paper, click the Assign Officer link.

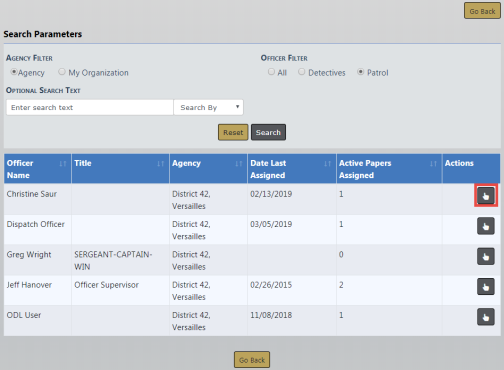
The a list of officers appear. Click the Select icon  to make your selection. You can also apply filters to shorten the list from which to choose.
Officer Details window opens. This is where you can leave comments to officer and also check to notify officer.

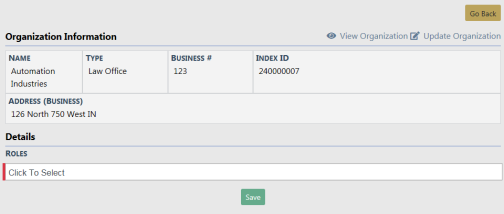
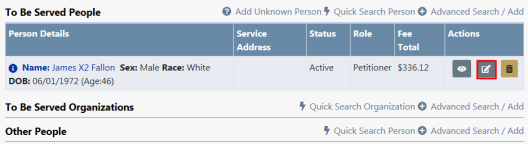
Next two sections are about the Persons/Organizations to be served and the Other Persons/Organizations involved with the paper. Caliber Public Safety recommends using the Advanced Search/Add link to search Master Index data. For more information on Master Index, refer to Master Indices.
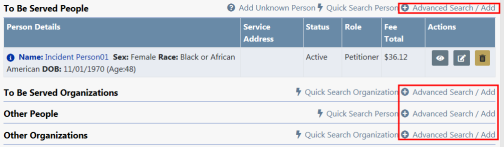
| • | The Add Unknown Person link captures service where evictions might be involved, or total number of people to be served is not known. Agencies have different uses for this. |
| • | The Other People/Organizations section captures the non-serveable persons or organizations of the paper. Typical usage is for the payor, and where garnishments and fees are handled. |
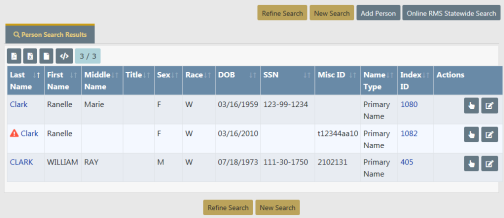
Perform search on the person /organization that you would like serve. Select the person that is to be served, if exists, by the Index I.D. or by using the Select icon in the Actions column. Add new person if not in the Master Index. For more information on adding a person refer to Adding Person in the Master Indices section.
Half way down is a drop-down that lets you set the Status for the person. This is what triggers your Master Name Index to notify officers of an Active Paper when a master name search is done. Also, click on the Select Service Address link to select the address that ties to the selected person.
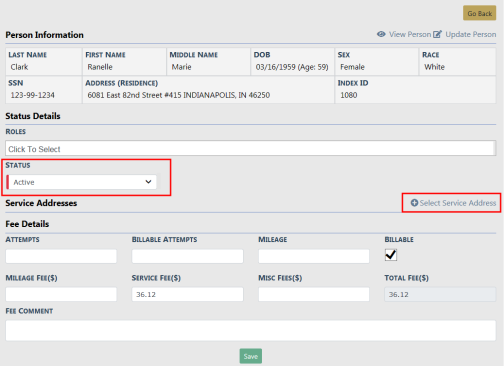
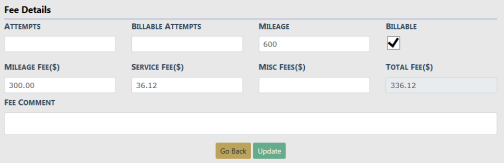
Fee details are discussed little more in detail later. From the officer serving the paper they typically only have access to the non gray boxes and the comment section. Attempts also can be captured in the log with a note of mileage. The use of this would be a business process determine by agency of when and whom applies Fee details.
Click Save to save the person/organization record to the Court Paper.
Adding Other Person/Organization to paper is done by some advanced search/add method. After selecting from Master Index or adding new you will be taken to this page. For more information on Master Index, refer to Master Indices.
Note: The Fee collection only shows after the Payor Role is selected. You can have more that one role assigned.
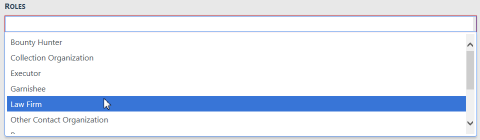
| • | You can select more than one role. The Payor role triggers the Fee Collections section that keeps track of fees owed and is searchable. |
Click Save to save the other person/organization record to the Court Paper.
The last sections are the Attachments and Forms sections. You can add any relevant attachments to the paper or if your agency has a custom form associated with civil process it would be selectable here as well.

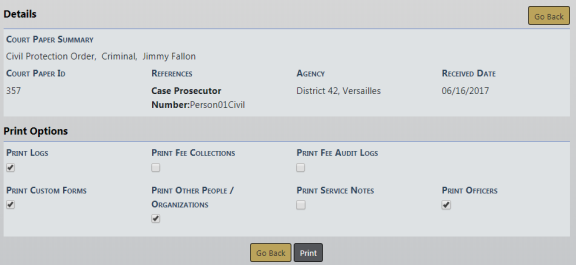
From the View Court Paper and Edit Court Paper screens there are Print and Quick Print options on the top right of the screen to print a cover page for your civil/court paper.

The Print button gives you selectable options to include on your cover sheet, whereas, Quick Print does not.
System creates system log entries automatically. You can also click the Add Log Entry link to manually enter log actions.
While on the Court Paper, page down to the To Be Served People section. . The permissions to manage Fee details is given by default to both the Agency Admin Role and LEA Clerk Management Role; all other users only have ability to edit the Attempts and Mileage boxes.
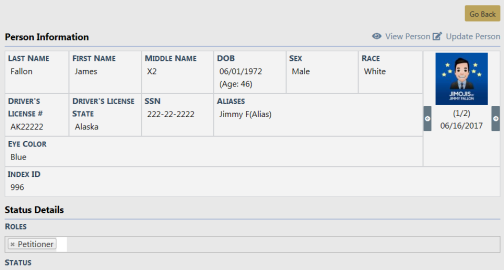
Click on the Edit icon to open the court paper. The Person Information displays.
At the bottom of the page is a section where you fill in the information in regards to tracking the service of the paper. You can notate attempts, the mileage for the attempts, and the fee’s to be collected in regards to the court paper.
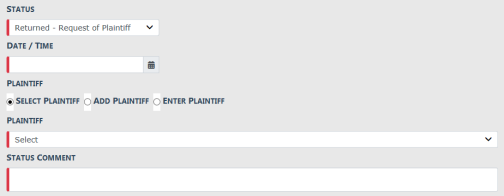
The Status of the paper would be changed to show the final status that the paper would have. Choices would be in status details section in the following screen shot to capture a served-executed paper service.
Select the Update button to save your changes.
Once you are finished with paper the Fee Collections section is completed. You now want to be able to collect fees and keep track of what has been paid on and what might still be owed.
Click the Edit icon on the Organization Details for the Payor and then click the Add link. This will create another entry point for receiving remainder fees as they come in.
Fee Audits also display on the Edit Court Paper screen.
You can click the Print or Quick button to generate a Court Paper Report. For details on printing the report, refer to Print Court Paper.