You can initiate the approval process one of three ways:
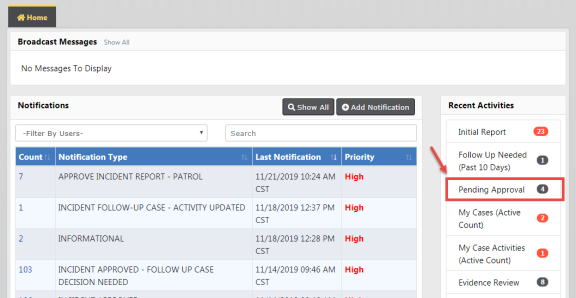
| • | Click on Pending Approval in Recent Activities section, located on the right side of the home page. |
| • | Directly from the Notification when Incident Reports are submitted for approval. |
| • | Directly from the Incident. |
Note: You can disapprove or change the status back to Initial Status on approved incidents by way of the Incident Status form. For more information, refer to Changing Incident Status.
Note: If your agency configures Review Routing, a Secondary Review Route may initiate additional review opportunities after an incident is approved. With Online RMS 11.6 and above, the reviewer may also include Disapproval Comments during Secondary Review.
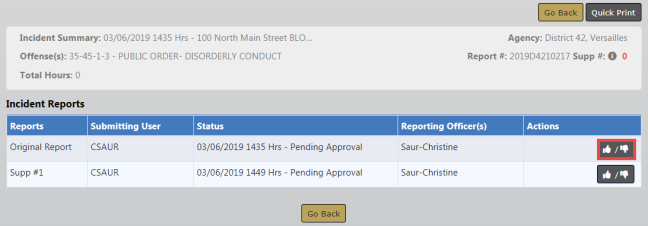
Initiate the incident approval process by clicking on Pending Approval under Recent Activities.
Click on the select icon  to select the appropriate incident from the list.
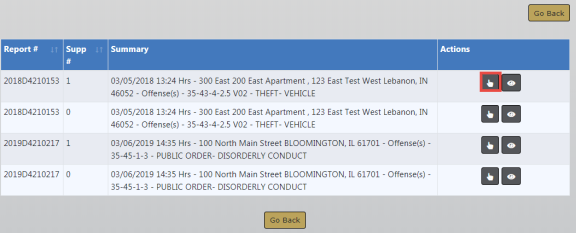
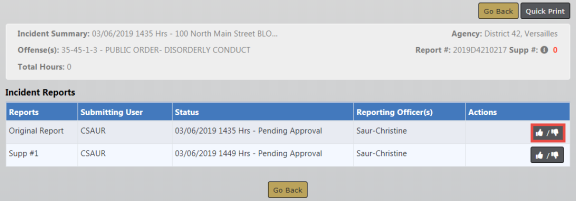
Click the Approve/Disapprove button to open the Incident Report.
The Incident Report opens. Continue with the approval/disapprove process. For more information, refer to Approval/Disapprove Process.
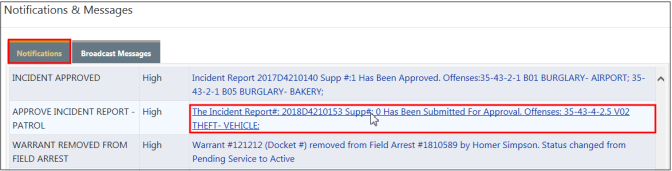
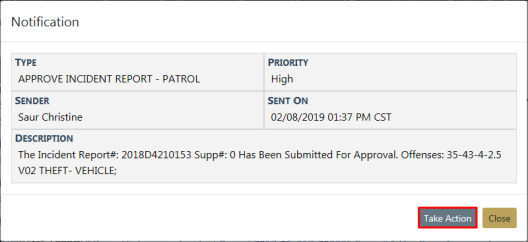
Users with a supervisory role for their agency will receive notifications when Incident Reports are submitted for approval. A supervisor can initiate the approval process directly from the notification.
For more information about accessing notifications, refer to Notifications.
Click on the appropriate notification to initiate the approval process.
Click on the Take Action button.
The Incident Report opens. Continue with the approval/disapprove process. For more information, refer to Approval/Disapprove Process.
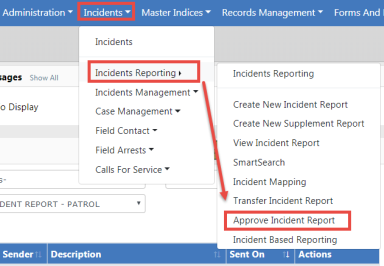
Users with a supervisory role can also initiate approval directly from the Incident.
Click Incidents on the top navigation bar, click on Incidents Reporting, then click on Approve Incident Report.
The Incident Search - Approve Incident Report screen appears.
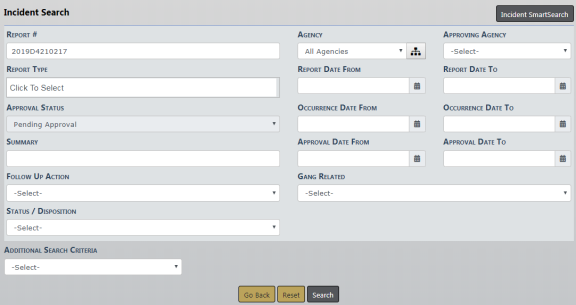
Enter the search criteria, click on the Search button to display the search results, then click the select icon to begin the approval process.
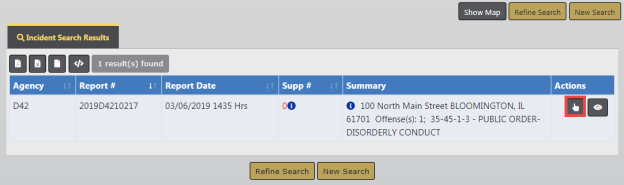
Click the Approve/Disapprove button to open the Incident Report.
The Incident Report opens. Continue with the approval/disapprove process. For more information, refer to Approval/Disapprove Process.
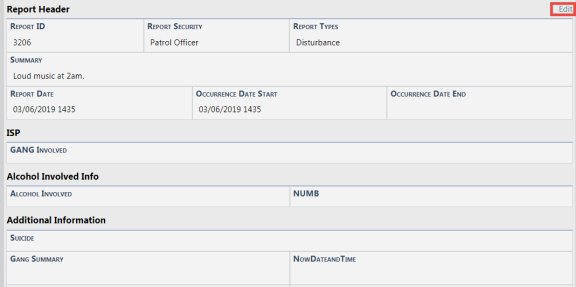
After choosing a method to initiate the approval process, the Incident Approval screen appears, defaulting on the Summary tab.
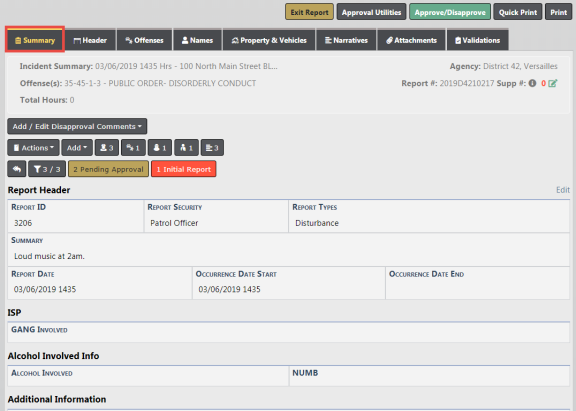
You can perform various functions, such as check for warnings, search for offense or NIBRS codes, add disapproval comments if applicable, and review the incident report. Supervisors can also edit the incident report providing the agency is setup to allow this function.
Note: If your agency configures Review Routing, a Secondary Review Route may initiate additional review opportunities after an incident is approved. With Online RMS 11.6 and above, the reviewer may also include Disapproval Comments during Secondary Review.
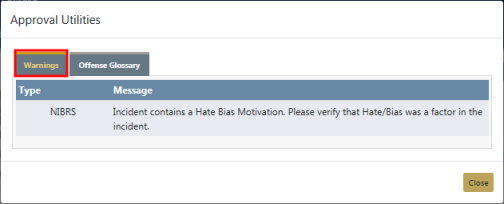
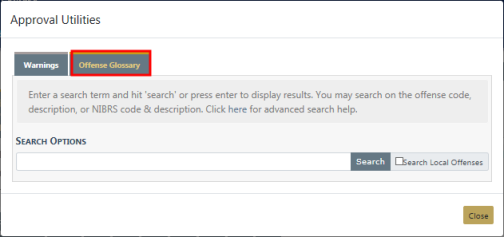
Optionally, click on the Approval Utilities button on the top right of the page to view Warnings and search for offense or NIBRS codes using the Offense Glossary.

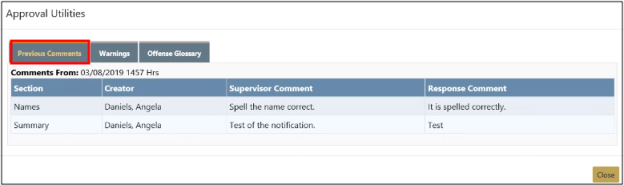
A Previous Comments tab appears if the incident report is disapproved at least once. This tab contains comments that are made during the disapproval process.
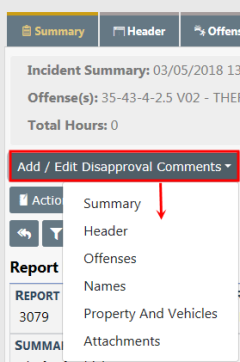
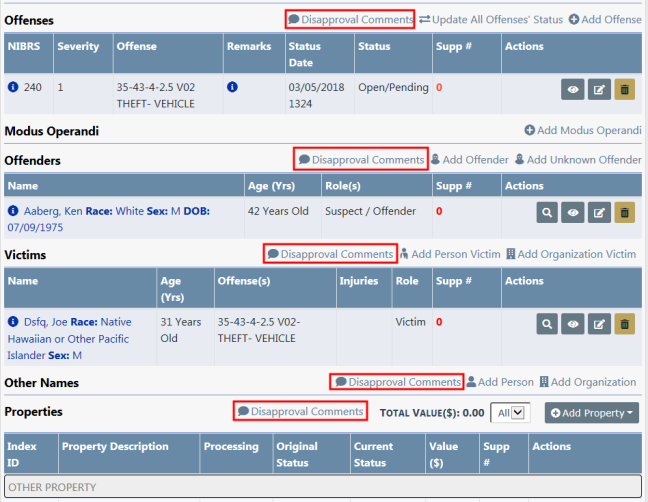
If applicable, you can add disapproval comments to various sections of the incident report two ways.
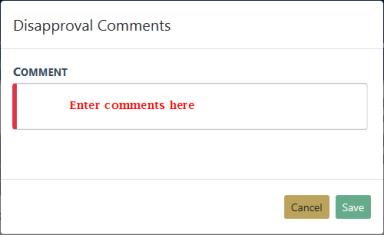
| • | Click the Add/Edit Disapproval Comments, then select an option from the list to incorporate disapproval comments to various sections. Add your comments then click Save. |
| • | Or, you can page down and add Disapproval Comments to various sections like shown in the example below. |
The agency setup dictates whether or not supervisors can edit the incident report during the review process. If supervisors have been granted edit privileges, an Edit link appears on the top right of applicable sections.
Click on the green Approve/Disapprove button on the top right of the incident report to open the Approve Incident Report.

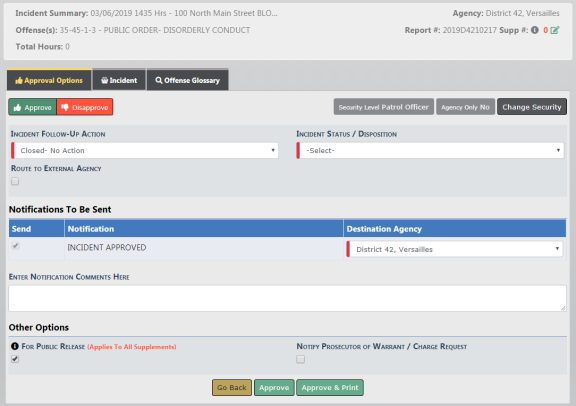
There are four tabs on the Approve Incident Report screen:
| • | Approval Options |
| – | Contains the necessary options to either Approve or Disapprove. The Approve Incident Report screen defaults to this tab. |
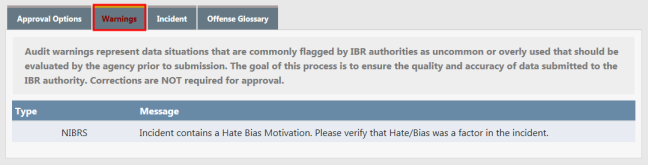
| • | Warnings (if applicable) |
| – | Contains Incident Report validation warnings. |
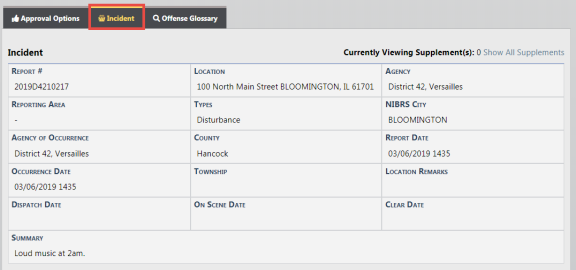
| • | Incident |
| – | Incident Report in view only mode. |
The Offenses section includes details for the related NIBRS Offense code, NIBRS Offense Title, and offense description. Hover the mouse over the blue information bubble to view a summary of this information, or click on the blue information bubble to view details.
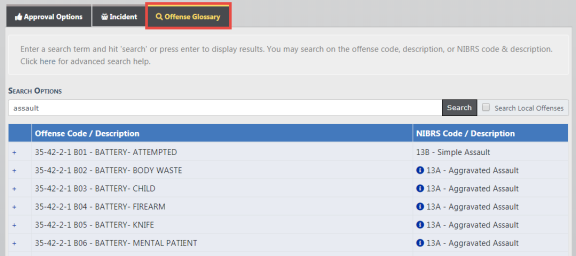
| • | Offense Glossary |
| – | Contains a feature to lookup offenses to confirm accuracy of the offense selected for the Incident Report. Enter the search criteria in the search field provided, then press Enter or click Search to display a list of NIBRS Codes that contain the entered text. |
Approval Options
Depending on your agency’s business practice, supervisors may have various options when approving a report:
| • | Restricting reports to the internal Agency Only. The Route to External Agency button is gray when the report is restricted to the internal agency, and green when selected to route to external agencies. |
| • | Click on the Change Security button allowing for greater internal security among the users within an agency. |
| • | Choose the Follow-up Action. |
| • | Choose the Status/Disposition. |
| – | Your agency administrator has the ability to map Incident Status codes to Offense Status codes to prevent mismatches. During the approval process, if you set an Incident Status to something other than what has been mapped to an Offense Status, a message appears disallowing that selection and it prompts you to verify the information and make any necessary changes. Refer to your agency administrator for more information. |
Note: The Follow-up/Action option you choose drives what Incident Status/Dispositions are available for selection.
The different options available will depend on the workflow selected for Case Management by your agency. The Notifications to Be Sent section generates a notification to request a follow-up Case determination in an optional workflow. For more information refer to Case Management.
Make other necessary updates.
Click the Approve button to finalize the approval, or click the Approve and Print button to finalize the approval and print.
When Disapprove is selected, a comments box displays so the supervisor can advise the user of the reason for the disapproval. Enter comments then click the Submit button.
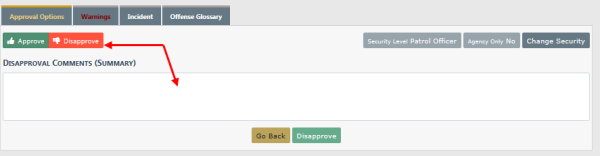
The disapproval comments now appear in the Previous Comments tab in Approval Utilities.
