The Evidence Custodian can use this link to show evidence or held property movement from one place to another. The Status of the evidence or held property must be Checked-In or Check-out to take this action. An example would be moving evidence from one shelf to another within the evidence or held property room. Another example would be consolidating evidence in temporary lockers to make lockers accessible for more evidence or held property.
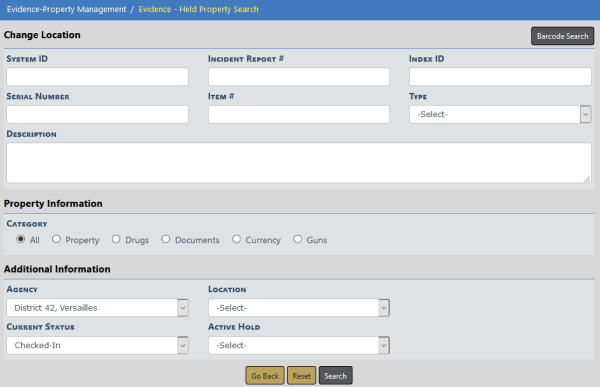
Click on the Change Location link on the Evidence/Property Management page to display the Evidence - Held Property Search - Change Location screen.
Select a Category and enter other search criteria. The fields below the Category change based on your Category selection.
Click Search. Or if you are equipped with a barcode scanner, click the Barcode Search button to search records by scanning the barcode.
The Change Location Results screen appears.
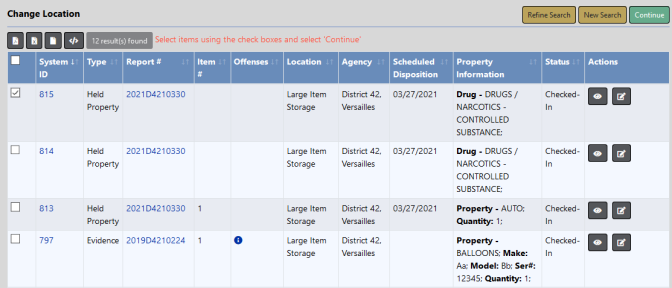
Select one or more records then click Continue to display the Change Location screen.
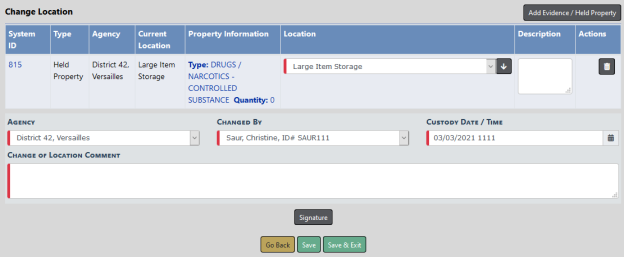
Changed By defaults to the logged in user. Enter comments, choose the Location from the drop-down list, and enter or change other necessary data.
Note: The Location drop-down list depends on the Status and Type of evidence/property.
If you wish, you can also add additional evidence or held property items to the Change Location list by clicking on the Add Evidence/Held Property button on the top right of the screen. The Add Evidence/Held Property button takes you back to the Evidence - Held Property Search - Change Location screen. Follow the same process as above to search and select the records you want to add then click Continue. The additional records are then added to the Change Location list.
Click the Signature button to sign if necessary
Click Save to save your changes and remain on the page to print Receipts, Labels, or Chain of Custody. For details, refer to Print Labels, Chain of Custody, Receipts.
Click Save & Exit to save your changes and exit the page.