Create a Photo Lineup from a Master Person Index record that already has an existing photo. If the person does not yet have a photo, one must be added. For instructions on adding an initial photo refer to Adding Photos.
1. Search and select a person from the Master Name Index. For instructions on searching for a person refer to Searching Master Records.
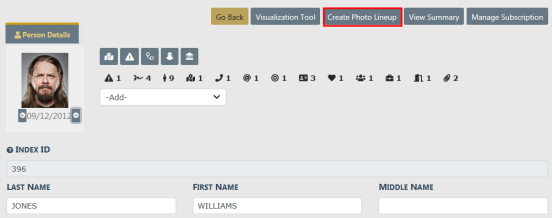
| 2. | Select the Create Photo Lineup button. |
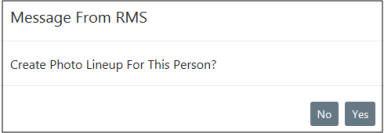
| 3. | Select Yes to confirm the creation of the Photo Lineup. |
| 4. | The Photo Lineup page appears. |
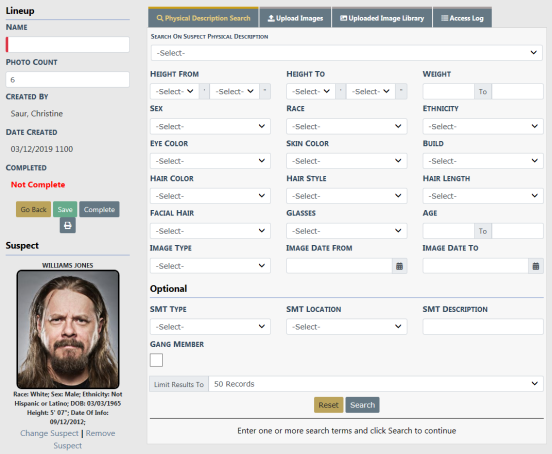
| • | The left side of the window contains Lineup details such as the name, photo count, status, dates, lineup images, etc. |
| • | The right side of the window contains tabs, with each tab serving a particular purpose. |

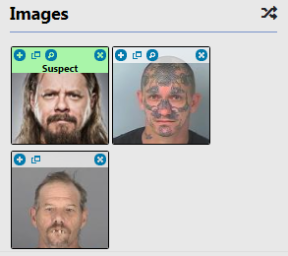
| • | The primary person photo displays under Suspect on the left side of the page. |
| • | A Lineup window displays a status of Complete or Not Complete. You can save your unfinished work and complete it another time. |
| • | The Photo Count is the number of images that must be on a lineup as specified by the Agency. |
| 5. | You must enter a Lineup Name. |
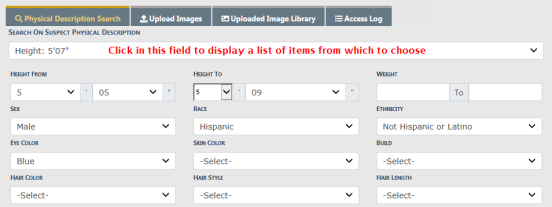
| 6. | Optionally, click on the Search On Suspect Physical Description drop-down menu to select the physical description information for the person image, to use for searching and finding similar images. After selecting from the list, search parameters will populate automatically based on your selection. Adjust the parameters as needed. |
Or you can manually enter the search parameters without selecting from the drop-down list.
For example, if the search parameter displays Large you can change it to Small; or change it to -Select- if you do not want to include the build in your search.
| 7. | Select the Limit results to drop down list to adjust the maximum number of photos in your search results as needed. |

| 8. | Select the Search button to find person photos in Online RMS that match your search criteria. The matching person photos appear on the bottom of the window. |
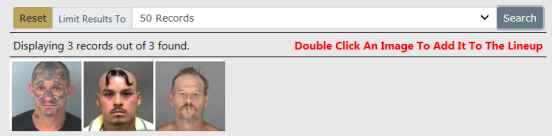
| 9. | You can either select from the displayed images for the Lineup, upload image files from your local or network drive, or both. |
Select Displayed Images
a. Double click on the displayed images you want to add to the lineup. The chosen images appear on the bottom left of the window under Images .
Upload Image File
a. Select the Upload Images tab, and select the Add Files button or Drag Files to add photos from your local computer or network drive. For more information on uploading files. refer to Add Attachments.
b. Imported images files are added to Images automatically and saved in the Uploaded Image Library tab for future use.
| 10. | Get additional photo information. |
a. Click on the Quick View folder icon to open a Person Quick View tab containing details of that person.
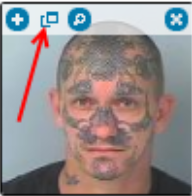
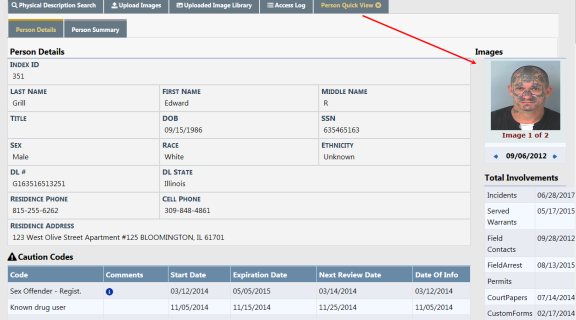
Click on the X to close the tab, if you wish.

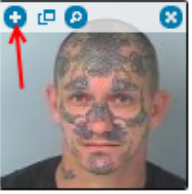
b. Click on the + icon to view a larger image of the lineup photo.
c. Click on the  icon to replace this image with another.
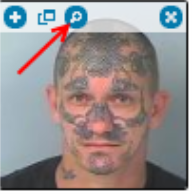
A Select Image window appears with images from which to choose.
| 11. | If you wish to save your changes and finalize the Lineup later, click the Save button. The Save button changes from red to green. |
Once saved, you may return to this Lineup to make additional changes until you finalize it by marking it as Complete.
| 12. | Finalize the photo Lineup. |
a. When you are satisfied the Lineup is complete, click the Complete button to finalize.
b. The status changes from Not Complete to Complete.
Note: The number of lineup images must match the Photo Count as specified by the Agency before the lineup can be completed.
| 13. | Click the Print icon to the right of the Complete button to print the Lineup. For detailed instructions on how to print a photo lineup refer to Print Photo Lineup. |
| 14. | Click Access Log tab to view a log who accessed the lineup. For more information refer to Access Log. |