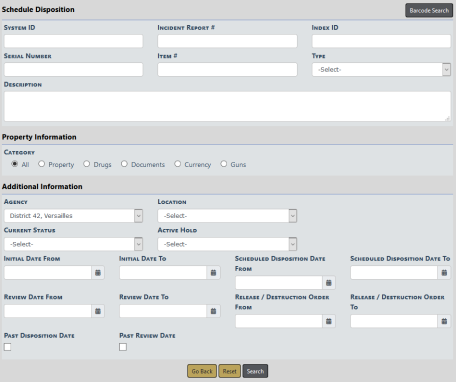
Click on the Schedule Disposition link to display the Evidence - Held Property Search - Schedule Disposition screen.
Select a Category and enter other search criteria into fields that appear below the Category based on your Category selection.
You can Schedule Disposition in mass by searching for Evidence/Held Property related to an incident report, based on a property location, property status, barcode scanning, or Initial Date range and other relevant dates.
Click Search. Or if you are equipped with a barcode scanner, click the Barcode Search button to search records by scanning the barcode.
The Schedule Disposition Search Results screen appears.
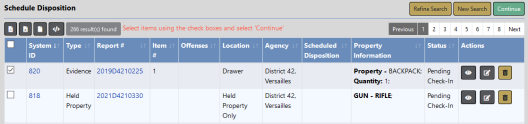
Select one or more records you want to schedule the disposition then click Continue to display the Schedule Disposition screen.
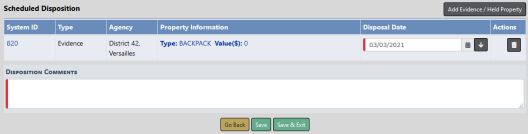
Choose Disposal Date from the drop-down list and enter Disposition Comments.
If you wish, you can also add additional evidence or held property to the Scheduled Disposition list by clicking on the Add Evidence/Held Property button on the top right of the screen to open the Evidence - Held Property Search Scheduled Disposition screen. Follow the same process as above to search and select the evidence or held propertyyou want to add, then click the Continue button. The additional records are then added to the Scheduled Disposition list.
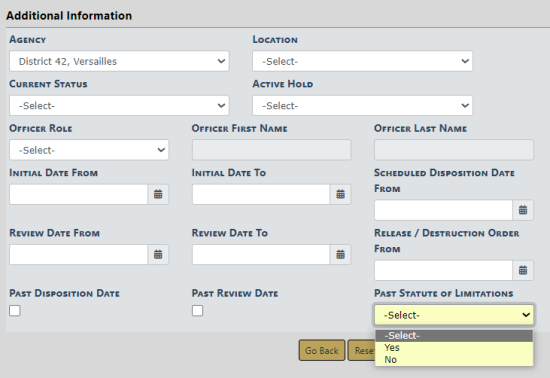
Note: RMS now supports searching for evidence associated to incidents that are past the statute of limitations. The statute of limitations is configurable by users with appropriate permissions in RMS Administration>Tables>State Offense Codes (or in NIBRS). Where a piece of evidence is associated to multiple incidents/offenses, the "younger" of the incidents/offenses determines the search result returned.
Click Save to save your changes and remain on the page where you can optionally Print Chain of Custody, Print Labels, and Print Receipt. For details, refer to Print Labels, Chain of Custody, Receipts.
Click Save & Exit to save your changes and exit the page.