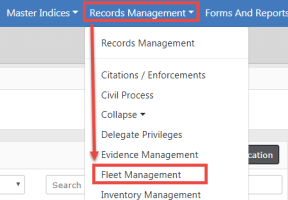
Click on the Records Management menu to access the Fleet Management Dashboard, an interactive user interface used as a launching pad for viewing and managing fleet data.
For efficiency, the following icons allow you to quickly perform particular actions.
| • |
 Add an Custom Form to the fleet vehicle and assignments. For details, refer to Add Custom Forms to Fleet Vehicle and Assignments. Add an Custom Form to the fleet vehicle and assignments. For details, refer to Add Custom Forms to Fleet Vehicle and Assignments. |
| • |
 End Open Assignments. For details, refer to Vehicle Assignments. End Open Assignments. For details, refer to Vehicle Assignments. |
| • |
 Add a Fuel/Oil/Mileage record. For details, refer to Manage Fuel, Oil, Mileage. Add a Fuel/Oil/Mileage record. For details, refer to Manage Fuel, Oil, Mileage. |
Other features of the Fleet Management Dashboard:
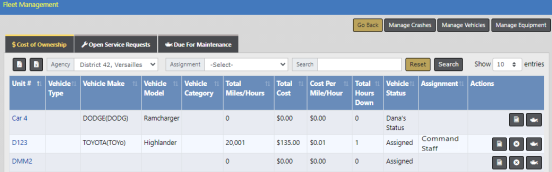
1. There are three tabs that contain existing vehicle information. Data within these tabs are read-only; capable of being displayed, but not changeable:

The active tab is a slightly different color than the other tabs.
| – | The total cost (purchase price + fuel and oil costs + maintenance and repair costs), total mileage or hours on the vehicle, and the cost per mile or hour. The dashboard defaults to this tab. |
| – | Vehicles tied to submitted maintenance requests that are pending completion. |
| – | Vehicles that meet set criteria since the last performed service maintenance. |
| 2. | Four buttons on the top right of the window: |

| – | Click the Manage Crashes button to add, update, or delete fleet crash reports. For details refer to Manage Fleet Crash Reports. |
Note: You can also create or manage a Crash Report under the Manage Vehicles option.
| – | Click the Manage Vehicles button to add, update, or delete vehicles. For details refer to Manage Vehicles. |
| – | Click the Manage Equipment button to add, update, or delete equipment associated with vehicles. For details refer to Manage Equipment. |
| – | Click the Go Back button to return to the dashboard. |
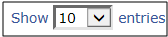
| 3. | You can change the number of entries that appear in the grid. Click on the Show Entries  and select 10, 25, 50 or 100. The default is 10. and select 10, 25, 50 or 100. The default is 10. |
| 4. | The bottom of the window displays the number of entries and it allows you to navigate between pages. |

The highlighted number is the page currently being viewed. Click Next to advance to the next page, or click the page number you want to view. Click on Previous to view the previous page.
| 5. | Each tab allows you to filter the grid data that appears in the grid. Depending on permissions you can filter by agency, assignments, and a specific word or phrase. |

a. Click on the tab you want to view, if different than the default Cost of Ownership.
b. Select one, two, or all three search options:
| - | If applicable, optionally select an Agency from the list. The results list immediately displays only records pertaining to that selection. |
| - | Optionally, select an Assignment from the list. The results list immediately displays only records pertaining to that selection. |
| - | Optionally, enter text into the Search box, then click the Search button or press Enter to display only records matching the entered text. The displayed list dynamically changes based on the entered text. |
Search text example:
On the Cost of Ownership tab enter Chev in the text box, then click Search or press Enter to show only records containing Chev. Change the text to Impala then click Search or press Enter to display only records containing Impala.
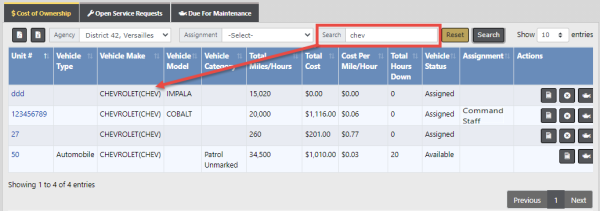
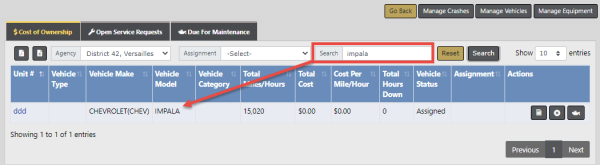
Note: Click the Reset button to remove the entered search text and list all available records.
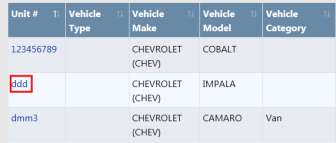
c. Click on the Unit ID to open the View Fleet Vehicle window for detailed information about that particular vehicle.
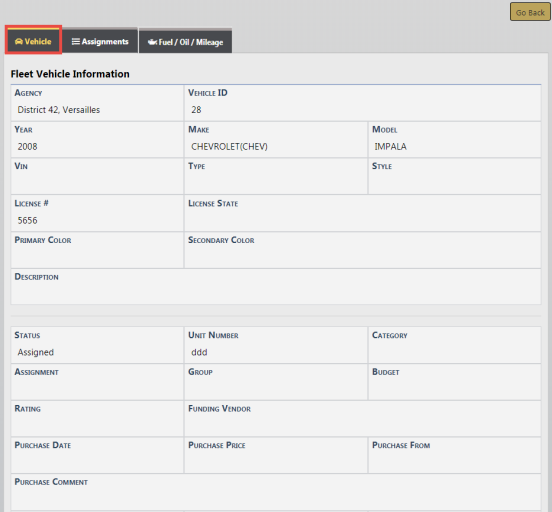
The View Fleet Vehicle window contains three tabs:

Vehicle
| - | Detailed information about the vehicle itself, such as license number, purchase price, make and model, current mileage, etc.; maintenance records; associated equipment; and service requests with statuses. The View Fleet Window opens to this tab by default as shown in the above image. |
Assignments
| - | A history of officers or employees who are non-officers assigned to the vehicle, including dates. |
Fuel/Oil/Mileage
| - | Summarization of fluid types and the dates and costs with mileage. |
d. Click on the Back button to return to the Dashboard. For your convenience, this button is located on the upper right of the window and on the lower center of the window; either will return you to the Dashboard.