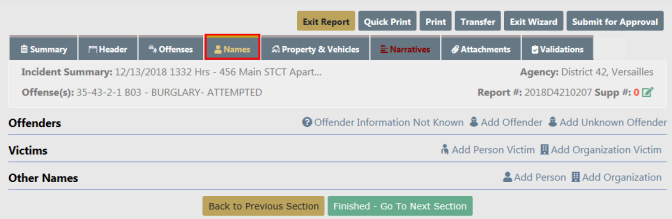
The Names Tab contains the list the names of all persons and organizations involved in the incident. The names section is broken into three sections, the Offender, Victim, and Other Names.
Agencies using Caliber CAD and entering person contact data, the Person Name data is automatically added to the incident report in Online RMS without user action using one of the following criteria:
| • | Person exact match. Caliber CAD CFS Contact Type matches Online RMS involvement role. |
| – | Person is added to the incident report Offenders, Victims, or Other Names section automatically without user action. |
| • | Person exact match. Caliber CAD Person Contact Type is not provided nor matches Online RMS involvement role. |
| – | Person is added to Master Person Index automatically without user action. Use Quick Select Names - CF People option to add person to incident report. |
| • | No Person exact match. |
| – | Use Quick Select Names - CFS People option to create the master person index record and add to the incident report. |
If the CFS module and integration is turned on, and the integration process cannot match people that exist on the CFS record with RMS, the unmatched names appear in this section of the Names Tab. With appropriate permissions, you have the option to add unmatched people to the Master Index in RMS, then associate them with the Incident Report.
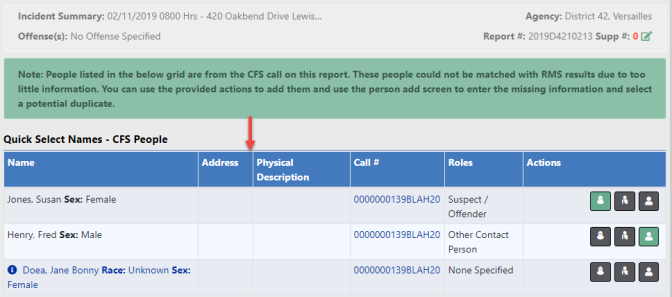
Click the appropriate icon in the Actions column to add the name as an Offender, Victim, or Other Person. Hover your mouse over each icon for a description of what the icon does.
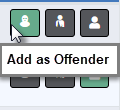
Note: A green icon suggests the Recommended Action based on the CFS Contact Type/Involvement Role. For example, if the Add as Offender icon is green, that is the recommended action.
Note: Names appearing as black text, lack unique person identifiers required to match to or create a new master person index record.
After clicking the appropriate icon, the Add Person screen appears. Fill in the appropriate information then add and select the person. When adding a new person record, the system notifies you if there are potential duplicates.
| • | For more information, refer to Adding Person. |
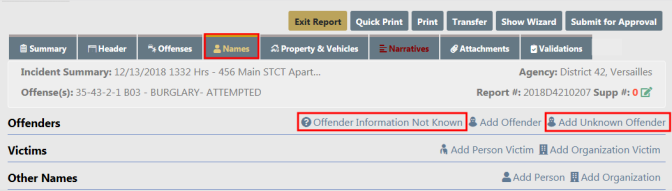
| • | Add Unknown Offender |
Selecting the Add Unknown Offender hyperlink prompts you to list the number of unknown offenders by using a drop down menu. Once the number of unknown offenders is selected, add applicable sex, race, age, and description to each. Not Known is also an acceptable answer.
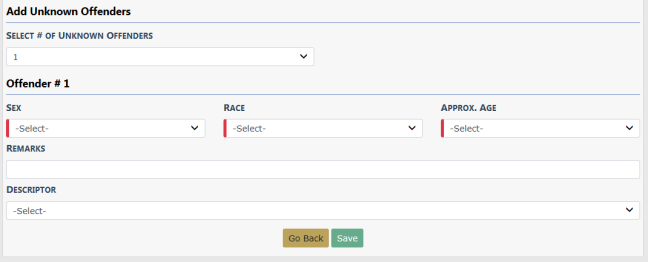
Click Save to create the Offender records.
| • | Offender Information Not Known |
Selecting Offender Information Not Known enters one Unknown Offender record as a place holder, allowing you to return and update the record when details are known.

The Offender Information Not Known hyperlink only appears when an Offender record is nonexistent.
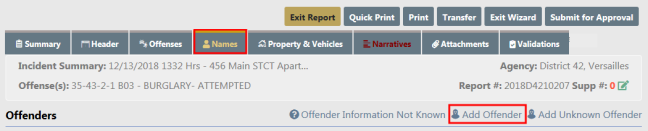
If the Add Offender hyperlink is chosen you are taken to the Master Indices Person Search screen.
You can select person records for the incident report three ways:
| • | Search by entering your own criteria, then select from the search results list. |
| • | Create new master person record and add it to the incident report. |
For more information on searching, selecting, and creating Master Person records, refer to Master Indices.
Note: Always search for Master Person prior to adding a new record. Search as broadly as possible to yield more results, then Refine Search as necessary to narrow the search. This will help to prevent Master Indices duplicate records for the same Person, Address, etc.
Once all information has been added to the person record, click the Select button to continue to the next screen to add additional NIBRS/UCR related information for that person.
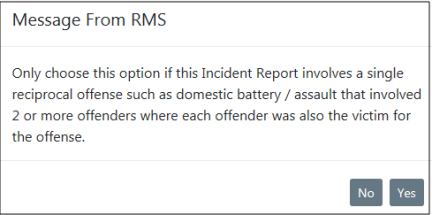
| • | When finished updating the offender information, and if the Field Arrest module is turned on and role of arrestee has been added, you receive a prompt asking if you would like to create a Field Arrest for this offender. |
Click No to return to the Incident without creating the Field Arrest, or click Yes to create the Field Arrest. For more information, refer to Names Tab. No matter what you choose, the process creates the offender record and adds it to the Offender section of the Incident.
If you select the box indicating that the Offender was also a victim of the offense, you are asked to confirm. Select Yes to confirm.
Select the Save button to return to the Names tab where the person will appear added to the Offender Section. If the offender was also a victim, the name is also listed under the victim section. Add additional offenders if applicable.
If the Field Arrest Module is turned on for your agency and you have appropriate permissions, you can create a Field Arrest and import incident data into the offender's arrest record using one of the following methods:
| – | Click on the Add Field Arrest icon  next to the offender's name when it exists. next to the offender's name when it exists. |
Select the items you want to import from the list that appears then supply any necessary information from additional fields that appear based on your selection.
Click Yes when asked to confirm the creation of the Field Arrest.
The Edit Field Arrest form opens. Update the Field Arrest as needed and click Update. For more information on updating Field Arrests, refer to Edit Field Arrest.
Click Go Back to return to the Incident Report.
The Add Field Arrest icon  changes to Edit Field Arrest
  . You can now edit the Field Arrest while on the Names tab of the Incident.
| – | Click the Add Offender link to add an offender to the Incident and role of arrestee has been added. After you finish adding the offender information, a prompt appears asking if you want to create a Field Arrest for this offender. |

Click Yes at the prompt, then follow the steps in Create Field Arrest from Incident
Society crimes will default Society as the victim.
Persons and Organizations can be added to the Incident following the same process used to add a Known Offender. For details on adding a Known Offender refer to Offender Section-Adding Known Offender(s).
At the bottom of the screen is an optional area where you can note Victim Rights Notification information if applicable.
Click Continue to return to the names tab where the person added can be seen. Add Additional victims in the same manner if applicable. If no other names are needed click the Finished – Go To Next Section button to proceed to the Property & Vehicles tab.
Select the Add Organization hyperlink to advance to the Master Indices Organization Search screen. Search for the Organization they need to add to the report as a victim.
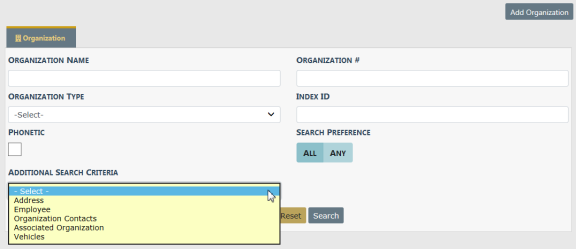
Note: Always search the Master Indices prior to adding a new record. Search as broadly as possible to yield more results then Refine Search as necessary to narrow the search. This will help to prevent duplicated records for the same Person, Address, etc. in the Master Indices.
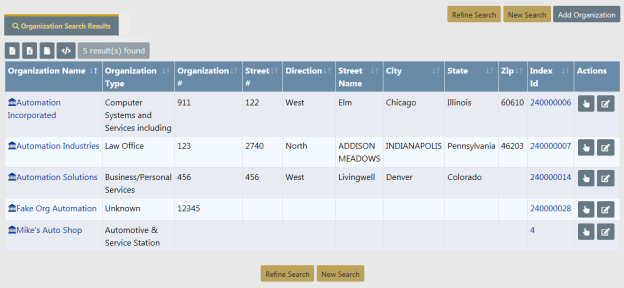
The search results display either a list of organization names meeting the search parameters or will indicate that there were no results found.
If the desired organization is listed, you can select the existing record as the victim for the report. Best practice is to review the information by clicking on the Organization Name or Index ID to review the information and verify it is up to date prior to selecting the record for the report.
If the organization does not already exist in the Master Indices, select Add Organization to add the new record. Enter the Organization Name and Type fields then click Save, or click Save & Select to save and add to the Incident. Add additional known information such as the organization’s address, phone number, employee information, and attachments.
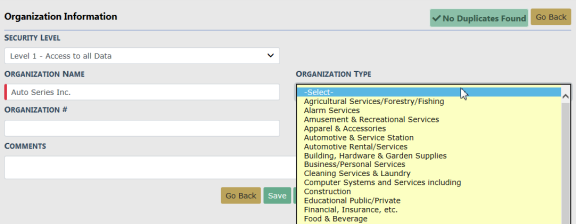
With proper permissions, you can select the Security Level. For more information, refer to Master Index Security.
If you are selecting an organization from the search results list, click the Select icon  to add the organization to the report. Add additional required information regarding the organization’s role, the offense(s) the organization is a victim of, and the victim type.
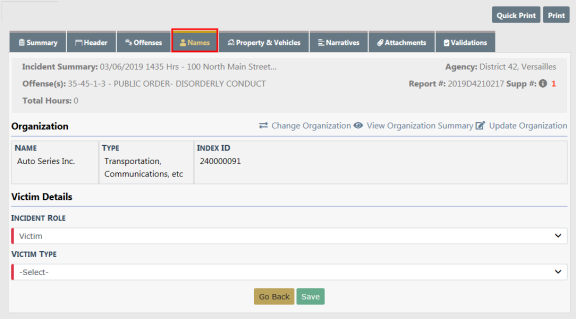
You can, with appropriate permissions, View Organization Summary, Update Organization information, or Change Organization by clicking on the respective links on this screen.

Click the Save button to add to the Incident. Add additional names and organizations for the report if applicable.
Additional persons and organizations can be added to the report when applicable.

The entry of Other Names is performed using the same method as adding a Person, Organization, Victim, or Known Offender.
For more information on adding a Known Offender refer to Offender Section-Adding Known Offender(s).
For more information on adding an Organization as a Victim refer to #AddOrgAsVictim.
Select the Finished – Go To Next Section button to proceed to the Property & Vehicles tab.
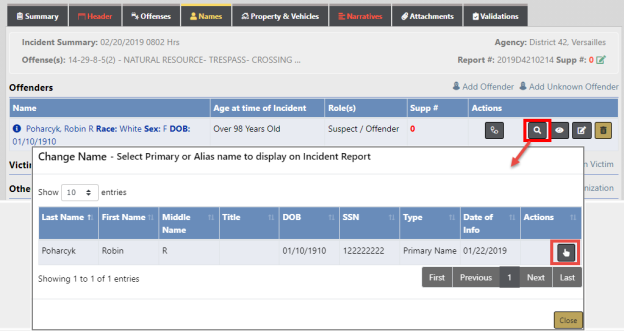
You can change a name from primary to alias or visa versa if you have already added a name in one or more of the name sections of the incident. Click on the magnifying glass  then select a name that appears in the list.