The Edit Field Arrest screens allows you to enter details of the Field Arrest.
There are action buttons on the top right of the Edit Field Arrest screen.
Note: Certain buttons may not be visible, depending on your agency's configuration.
_550x96.png)
| • | Go back - Return to the previous screen. |
| • | Duplicate - Duplicate the Arrest record for each Arrestee systematically to avoid duplicate manual entry. |
For more information, refer to “Duplicate Field Arrest”.
| • | Print - After the Field Arrest form is complete, you can print a Field Arrest Report from this page. |
For details, refer to “Print Field Arrest”.
| • | Transmit Livescan - After the Arrest record is complete, transmit the most recent physical description and the person images associated with that physical description to LiveScan. |
For details on using the LiveScan software, refer to “LiveScan”.
| • | Camera - After the Arrest record is complete, take a photo using Hunter Camera. Depending on your agency's configuration, there may be one or multiple cameras from which to choose. |
One: 
Multiple: 
For details on using the camera software, refer to “Hunter Camera”.
| • | View Field Arrest - Allows the user to toggle back and forth between viewing the field arrest and editing the field arrest. |
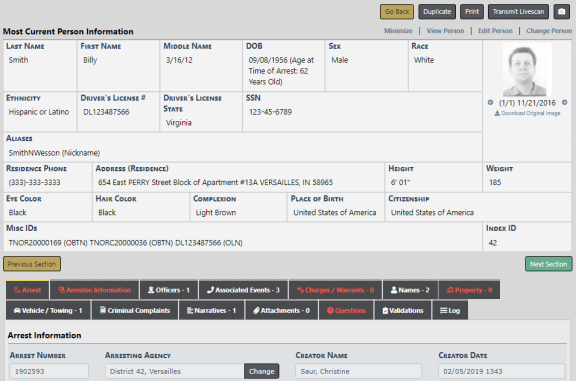
Individual tabs located in the center of the Edit Field Arrest screen organize the Field Arrest details.

You may wish to minimize the Person Information box so it is easier to go through your report. Do this by selecting Minimize at the top of the screen.
1. If you haven't already, add the Location. The location pulls from the Master Address Index. The recommendation is to always search for an existing Master Address record before adding a new one to prevent duplicates. The Location is required.
a. Click the Quick Search link to open the Quick Search window.

You have the option to search by the street address only, or by separate fields that make up an address such as street number, street name, city, etc.
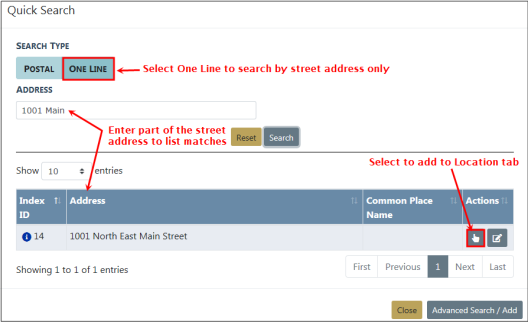
OR
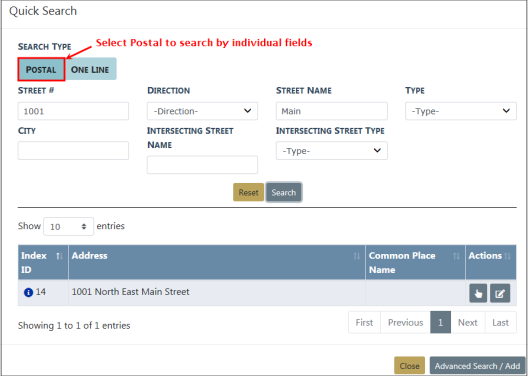
Note: If the Location you are looking for does not exist, click the Advanced Search/Add button to add it to the Master Address Index. For more information on adding a Master Address index record, refer to Master Indices.
b. Click the Select icon  to select the Location you want to add.
c. Only one location is associated to an arrest record. When you select a location, the Quick Search and Advanced Search/Add buttons change to view, edit, and remove location:

d. Click the View Location button to view details of that address.
e. Click Edit Location to change the address data, or click Remove Location to remove the location from the arrest record.
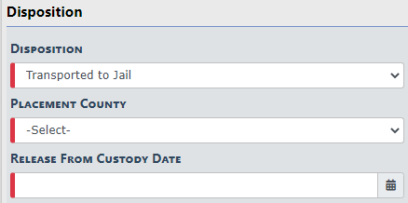
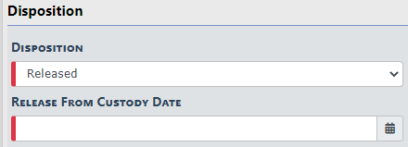
| 2. | Give the field arrest a Disposition: Based on what is selected, there are additional boxes that need to be completed as shown in the example below: |
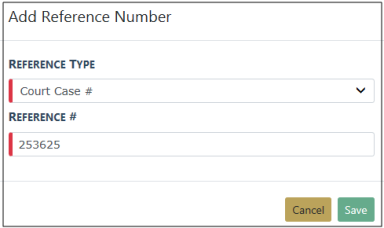
| 3. | Click the Add Reference link to add a Reference Number in the Add Reference Number window if applicable. |

| 4. | Enter the appropriate Reference information and click the Save button. |
| 5. | Click Next Section on the Edit Field Arrest screen to navigate to Arrestee Information tab, or click on the Arrestee Information tab. |
Note: Each tab has a Next Section link that advances you to the next tab. Or you may click on the individual tabs to navigate between tabs manually.

| 6. | Click on the individual Add buttons to enter the necessary Arrestee Information in the various sections. |
For example, click on Add Physical Description to add the Arrestee's physical description.

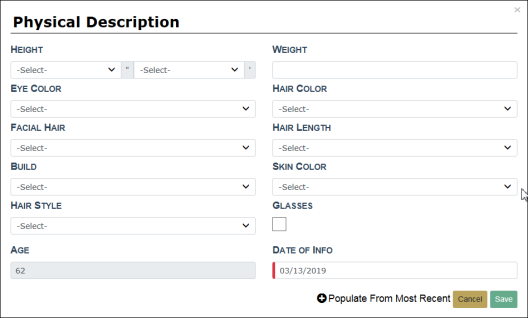
a. If arresting a previously known person you can import the existing Physical Description from the Master Person record. Click on the Populate From Most Recent button to populate the data from the most recent Master Person record.
b. Update fields as needed.
c. Click Save, or click Cancel to return to Edit Field Arrest screen without adding a Physical Description.
d. Continue adding all other necessary information.
Note:Citizenship under the Birth Place section is required. If Country is blank, it defaults to the same value as Citizenship. If needed, you can select a different Country than Citizenship.
Note: The Email/Web Addresses section supports social media sites, such as Facebook, Twitter, LinkedIn, Instagram, Snapchat, YouTube.
| 7. | If you would like to add multiple addresses, you can click the Make Most Recent icon on an existing address to make a duplicate of that address, then make any necessary changes. |

Note: Beginning with RMS 11.10, location search is greatly enhanced. Begin typing the address and the system will return RMS locations. If your agency has Google Places turned on, you will also see Google addresses. Links will appear that allow you to add addresses and/or interact with a map for location identification.
| 8. | Click Next Section on the Edit Field Arrest screen, or click on the Officers tab. |