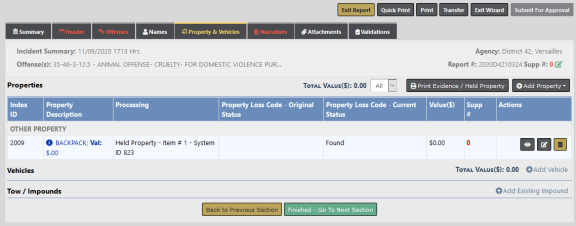
The Property & Vehicles Tab contains all the incident related property and vehicles.
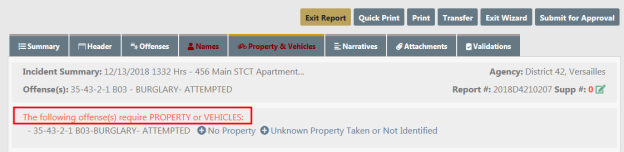
If there is an offense on the report that requires property or vehicle association to satisfy NIBRS/UCR validations, the tab will be red and there will be instructions on the page stating the requirement.
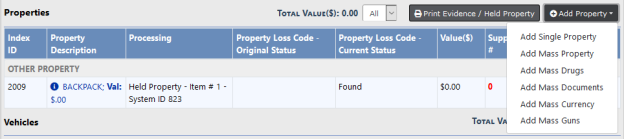
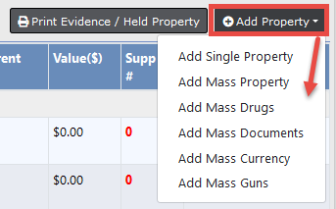
Click the Add Property button to display menu items from which to choose. You can add a single piece of property, or multiple (mass) property types listed.
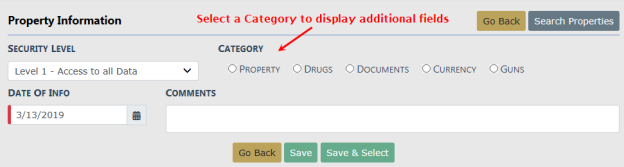
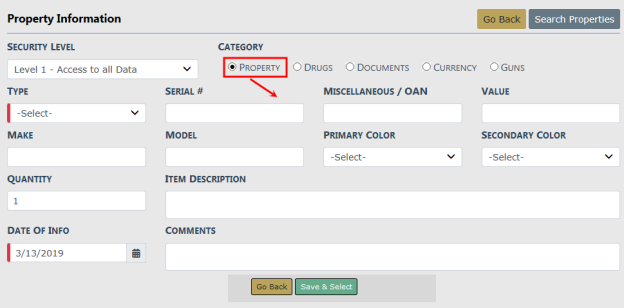
There are five Categories for adding property: Property, Drugs, Documents, Currency, and Guns.
The majority of the time when dealing with a piece of property for an Incident report, the piece of property has not been dealt with by the user’s agency. For this reason you are presented with the Add Property screen instead of a Master Indices search screen.
| • | Add Single Property |
Click Add Single Property to display the Property Information screen. Select the Category to display additional fields to describe the property in more detail.
Note: If you have reason to believe the piece of property you are going to enter on the report has been dealt with previously, use the Search Properties button to the top right, locate the existing property in the Master Indices, and add it to the report.
Note: Drug property quantities and measures may be edited through supplements that appear on the current report, but may only be edited by a user if they appear on an incident for which that user has ownership and if the QTY = 0 or UOM = Not Reported.
Enter necessary data, then click Save & Select to save your entry and add it to Incident Property.
| • | Add Mass Entries |
You can add multiple (mass) property types for Property, Drugs, Documents, Currency, and Guns. If you choose any one of the Mass options, you can add multiple property records on one screen, rather than add them one at a time.
Refer to Mass Entry for details.
Note: If you are entering Mass Currency, currency should only be used when dealing with large amounts of currency where the denominations are known. For smaller amounts, use the Property category and select Cash from the drop-down list. For example, $500 stolen from a person would be entered as Property, Cash and the description could state Miscellaneous 5, 10, & 20, dollar bills.
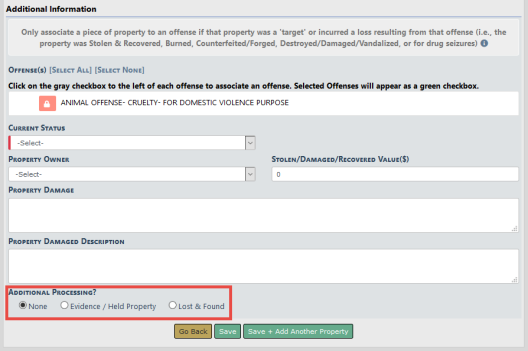
Enter the property information in the fields provided then click Save to display Additional Information.
You have the ability to process the property as Evidence/Held Property, Lost & Found, or None (neither), providing your agency elected to turn on these modules.
Note: Your agency may elect to default the Additional Processing selection based on the Incident Current Status and Property Loss Current Status. For example, if the Incident Current Status is Seized, the agency may elect to default the selection to Evidence/Held Property. Contact Caliber Public Safety by entering a Support Ticket to request this configuration option.
If you choose Evidence/Held Property or Lost & Found, a data entry screen appears with data specific to the option you choose. You must also select a Current Status from the drop-down list.
Note: With Online RMS version 11.6 and above, your agency administrator has the option to configure which Statuses default the Processing radio button to Evidence/Held Property; otherwise, None is the default.
The Add Lost & Found Entry screen appears after selecting the Lost & Found button.
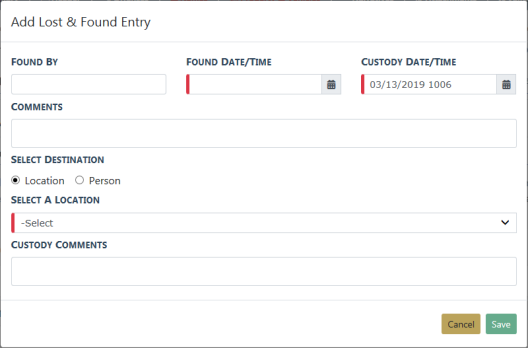
Enter the necessary information then click Save.
The newly entered Lost & Found information appears near the bottom of the Additional Information screen. If necessary, click on the Edit link to update the record.
Click Save + Add Another Property to save the new entry and add another property record, or click Save + Continue to save the new entry and display the property records.
Note: For information on the Lost & Found Module, refer to Lost and Found Property.
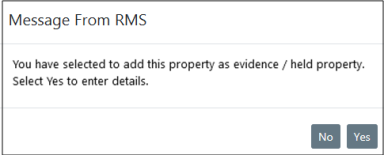
For Evidence/Held Property, select the Evidence/Held Property button, select a Current Status, then click Save to display an evidence confirmation.
Selecting the Yes button displays the Evidence - Held Property screen to enter the type (evidence or held property), date and time of recovery, the location the evidence is being stored, data and time it was placed in storage, description, comments, an extended chain of custody and if the evidence needs any testing.
The Status defaults to either Pending Check-in or Pending Check-in and Check-in, depending on your agency setting. The Location list of values (LOV) will be filtered based on the Status and Type.
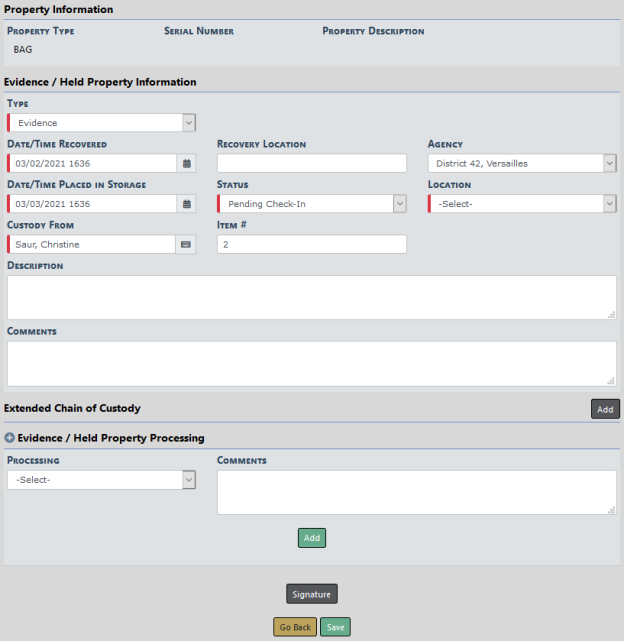
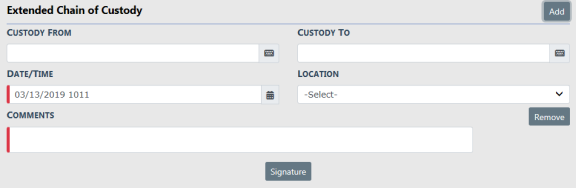
An Extended Chain of Custody can be entered to show if a piece of evidence was collected and transferred prior to entering the evidence. Click the black Add button to add one or more transfers if necessary. The Custody From and Custody To fields are tied to system users; however, you can leave one or both of these fields blank then add the data to comments.
Note: In a multi-tiered agency the Location list filters based on the selected agency.
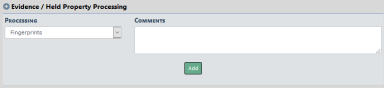
Under Evidence/Held Property Processing section, select a Processing option from the drop-down list and enter Comments. Click the green Add button to add it to the incident. Click the plus sign to the left of the Evidence/Held Property Processing label to add additional processing methods if needed.
Note: Your agency administrator has the option to set the Evidence_Processing_Required maintenance value to Y to require at least one processing record when adding evidence/held property records.
Select the Signature button to open the signature window.
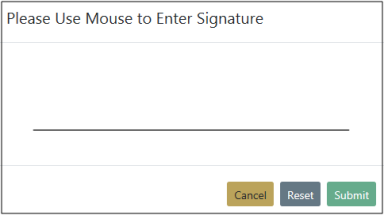
Sign for the custody change using the mouse then select Submit to apply the signature.
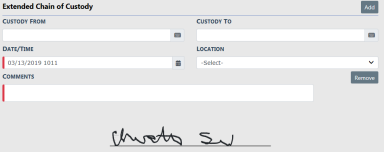
Select the Save button.
Click on the Print Evidence/Held Property button to print Labels, Receipts, or Chain of Custody from the current screen, or print at a later time.
Note: For more information on printing Labels, Receipts, or Chain of Custody refer to Print Labels, Receipts, Chain of Custody.
Select the Finished – Go To Next Section button to proceed to the next tab.
Note: A warning message displays to unauthorized users who attempt to remove Property from the Incident Report that is processed as Evidence/Held Property.
Note: For information on the Evidence/Property Management Module, refer to Evidence/Property Management Module.
All five property Categories support Mass Entry, a form that allows you to enter multiple property records on the same screen. Click on the Add Property button to display a list of Categories from which to choose.
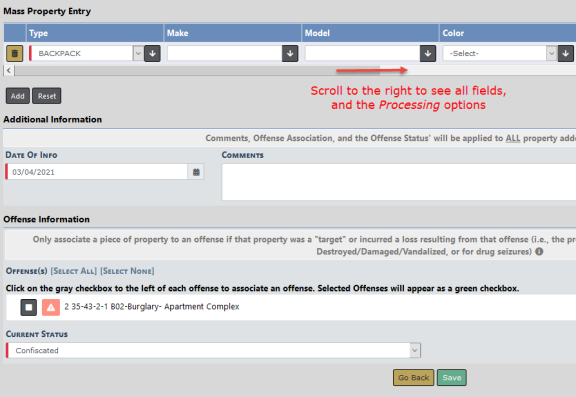
Select a mass category from the list to open the associated Mass Entry form. Add Mass Property is used in the example.
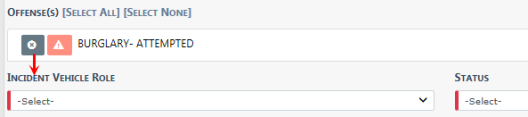
Note: The offenses that require at least one property appear in red, otherwise they appear in black.
If you select Recovered as the Current Status, a Recovered Date/Time required field appears.
Note: On setting status to recovered, RMS allows the user to capture recovered date and address and select an address from a list of all locations associated with the report.

Enter the property details in the fields provided; be sure to scroll to the right to see all fields. See Evidence/Held Property for instructions on entering the details.
Be sure to scroll to the far right for Processing radio buttons.

Add additional property rows if needed.
There are two ways to add additional property:
| – | To add one row, click the Add button on the left. |
| – | To add multiple rows, enter the number of rows you want to add in the text box next to the Add More Rows button, then click the Add More Rows button. |
Select the Current Status and, the Date of Info if different than the default, and any Comments.
You can associate all property listed with all offenses, none, or a specific offense.
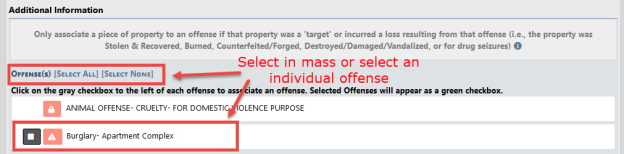
After selecting offense option, enter additional information if prompted.
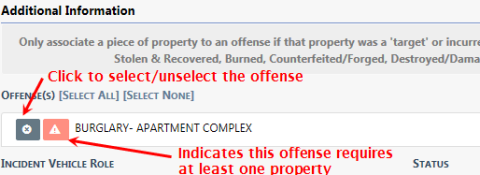
When an offense on the report requires a property or vehicle association, validations are in red advising of the requirement. Make note of the instructions indicating what property should be associated to what types of offenses. Hovering over the blue information bubble will provide examples.

Note: You can associate property to an offense later by clicking on the edit icon ![]() under the Actions column on the Property & Vehicles tab.
under the Actions column on the Property & Vehicles tab.
Click the Save button.
If you selected the Evidence/Held radio button on one or more property items, click Yes to enter the items as evidence/held property when prompted.
| – | The Evidence/Held Property screen opens where those are listed in mass. |

| – | Enter the information in the fields provided, and be sure to scroll to the right for all fields. |
| – | Select the Save button. |
You are taken back to the Property & Vehicles tab for review.
Selecting the Add Vehicle hyperlink will display the Search Vehicle screen.
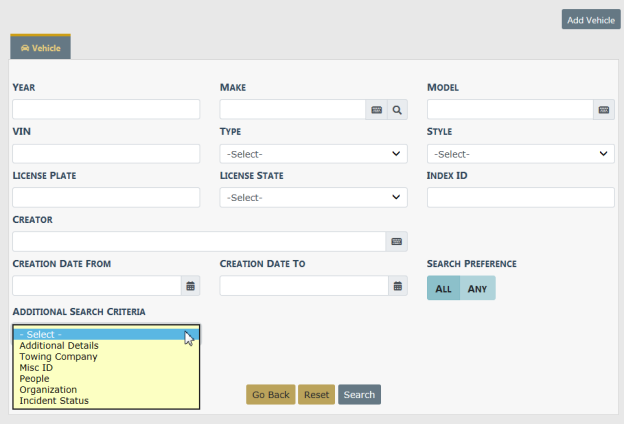
Note: Always search the Master Indices prior to adding a new record. Search as broadly as possible to yield more results and Refine Search as necessary to narrow the search. This helps to prevent duplicated records for the same Person, Address, Vehicles, etc. in the Master Indices, and it keeps all RMS system activities related to the record in a centralized location.
The search results display either a list of records matching the search parameters or will indicate that there were no results found. If the desired record is listed you can select the existing record as the victim for the report. Best practice is to review the information by clicking on the VIN or Index ID to review the information and verify it is up to date prior to selecting the record for the report.
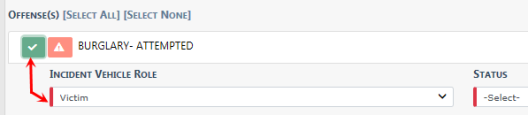
When an offense on the report requires a property or vehicle association, validations appear in red advising of the requirement. Make note of the instructions indicating what property should be associated to what types of offenses. Hovering over the blue information bubble will provide examples.
Crime Not Selected/Associated
Crime Selected/Associated
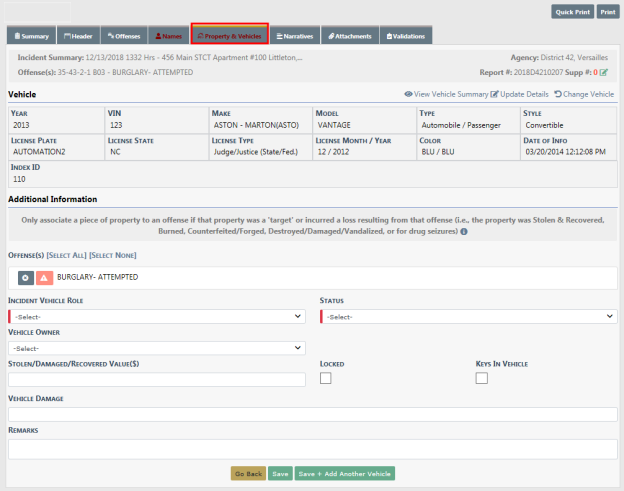
Once all this information is completed select either the Save & Add another Vehicle button to add more property or the Save & Continue button to return to the Property & Vehicles tab for review.
Once all Property & Vehicle have been added, select the Finished – Go to Next Section to advance to the Narrative tab.
Vehicle Tow/Impound can be associated with an Incident. However, the Tow/Impound grid will not appear on the Incident screens is the Agency is not using the Tow/Impound module.
Selecting the Add Existing Impound hyperlink displays the Vehicle Tow/Impound Search screen.
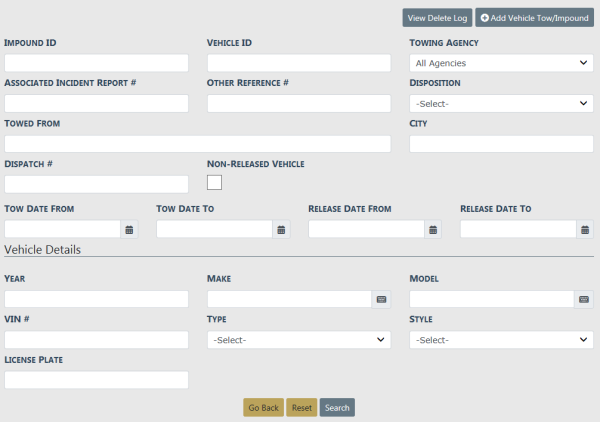
Enter the necessary data to search for the record needed, then click the Search button to view the results.

Click the Select icon  to select the record and to open the Associate Incident to Vehicle Tow/Impound page.
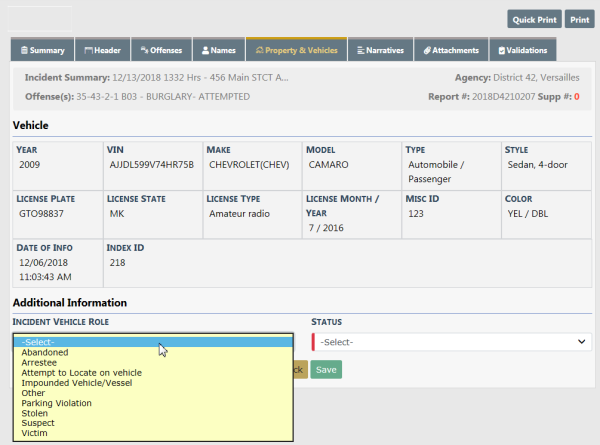
Select the proper Incident Vehicle Role and Status from the lists, then click the Save button.
The Tow/Impound record is now associated to the Incident.
