The inventory check-in process allows the manager to search for and check-in items that have been checked out (assigned) to a person, location, organization, or vehicle. A printed receipt to formalize the process is also available should one be needed.
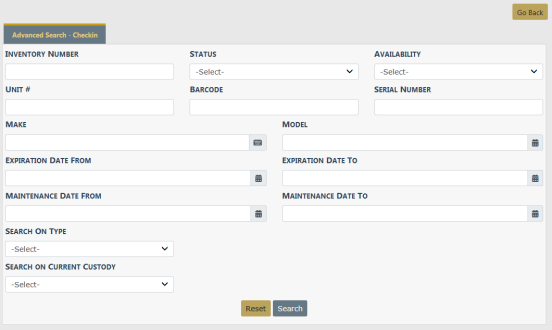
From the Inventory Management page, select Check-In to open the Advanced Search - Checkin page.
Perform a search to locate the item(s) you want to check in. Enter the number to checkin to the left of the item, then click the plus sign (+) to select.
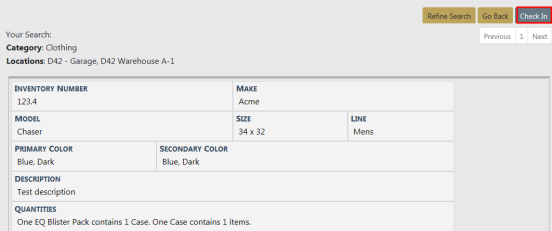

Select Check In to display the Check In page.
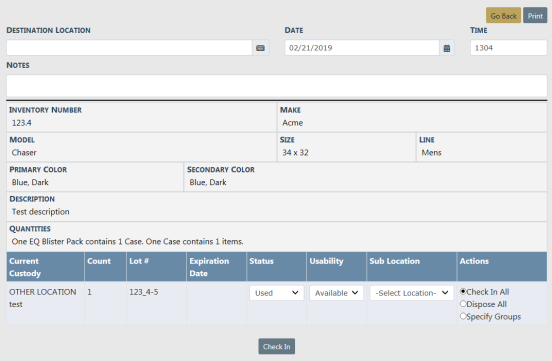
Complete the Destination Location field and other fields as needed. Select the applicable radio button in the Actions column.
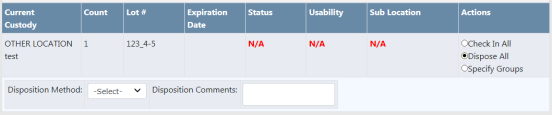
When you choose to Dispose of an item(s) you are given the option to select the Disposition Method and enter any Disposition Comments, and click Check In.
When you choose to Specify Groups Add Entry and Add Disposal Entry links appear. Click on the links to enter additional information.

A notification appears at the top of the screen advising the Check In was successful.
Note: For items checked back into a specific location, the on-hand count increases and the current location updates.